Add a Map Style
Webmaps are displayed using a set of rules that treat every item on the map in a specific way to render them using the colors, icons and shapes you see in your screen. This rules are stored in a file that can live in your computer or can be accessed via URL.
We will be using the OpenMapStyles from MapTiler. If you do not have a MapTiler account, check the pre-requistes section to create a free one.
Follow this steps to add a map style to your story map.
1 Sign in to you MapTiler account.
On your web browser, go to this link. Enter you username and password.
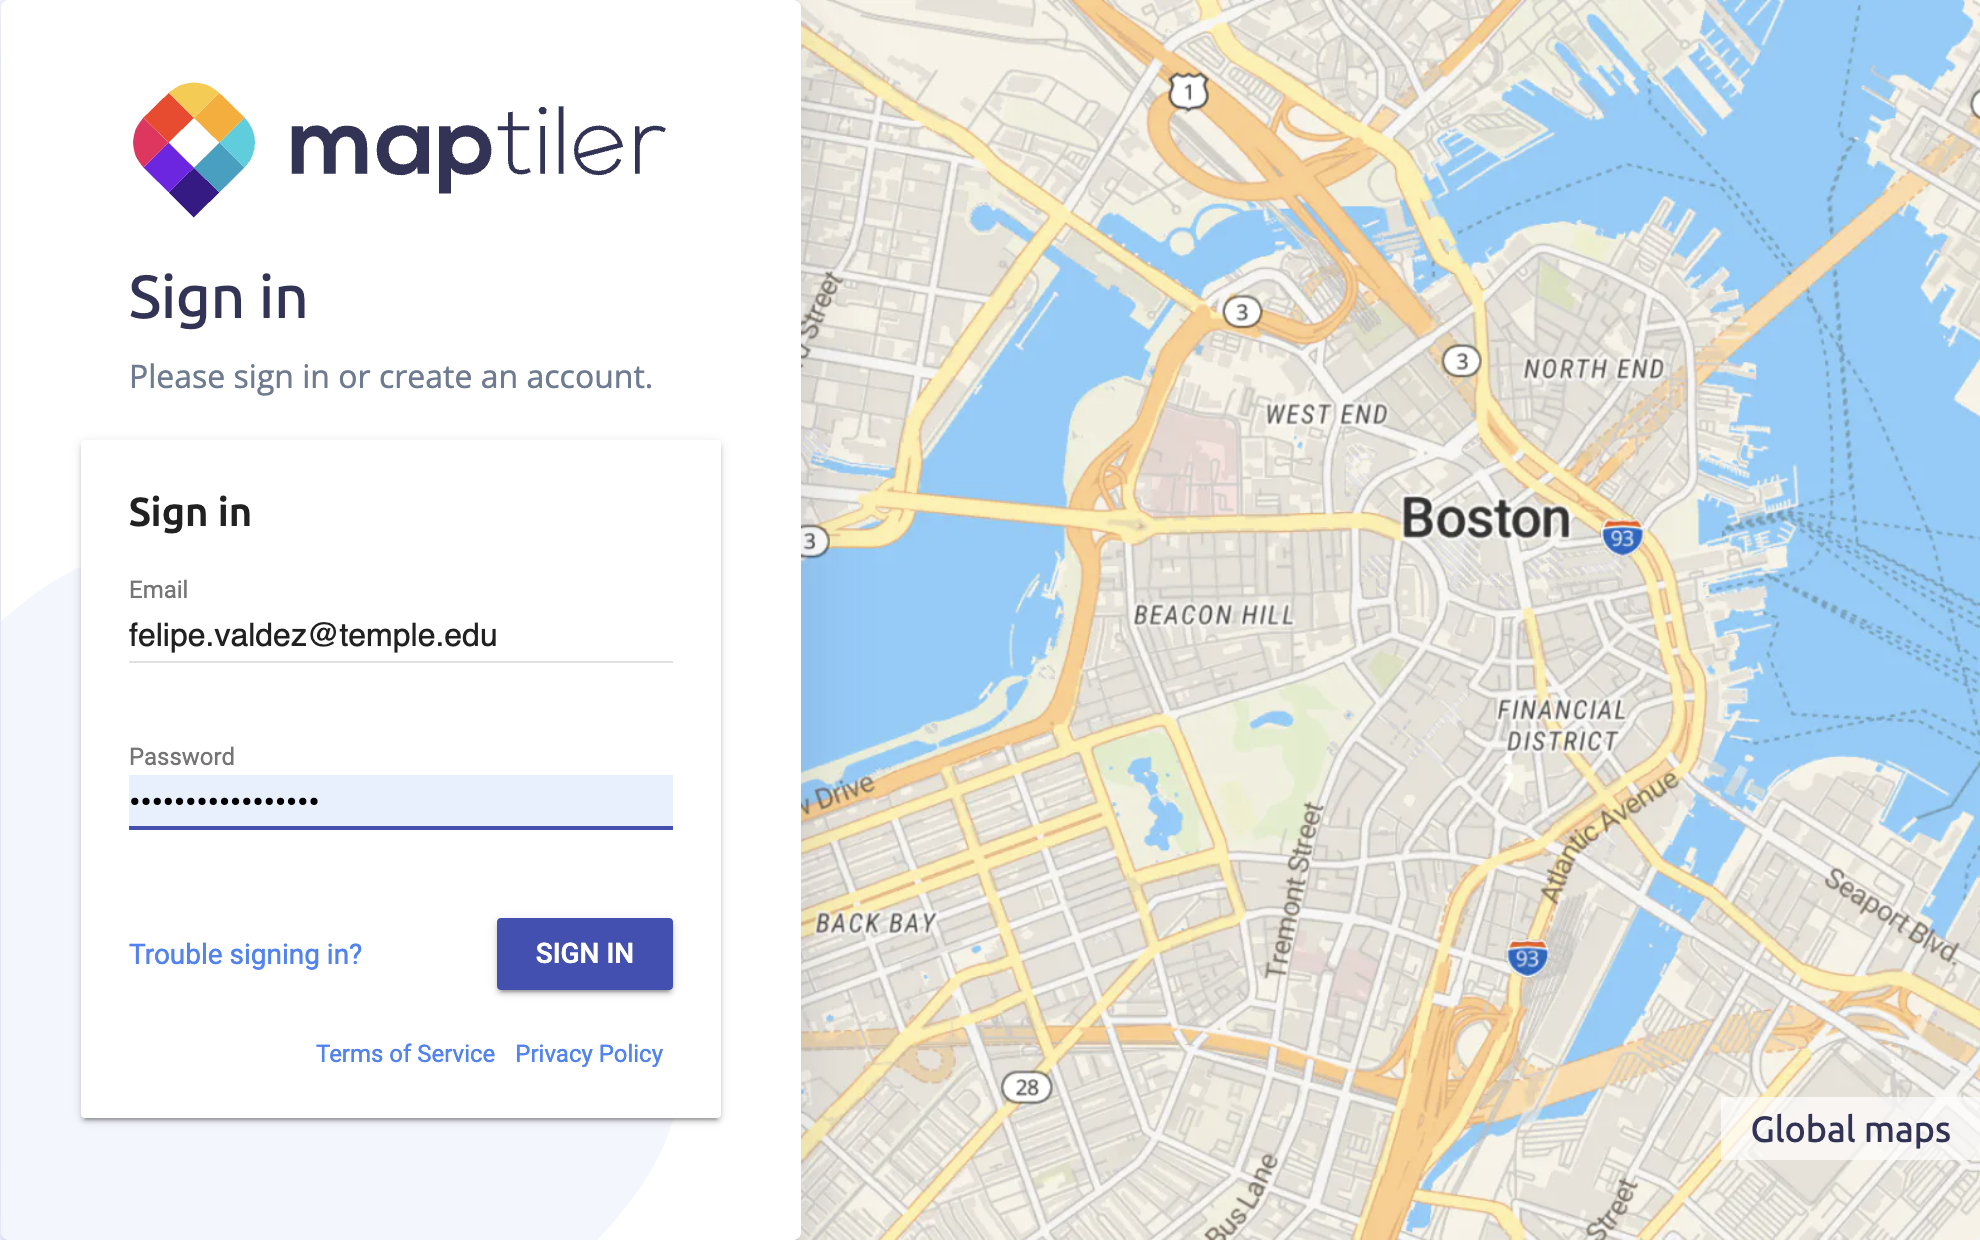
2 Select the map style you want to use.
On the MapTiler Maps screen you will see a list of pre made open styles.
Click on DataViz if you want to follow this tutorial, or any other style you prefer.
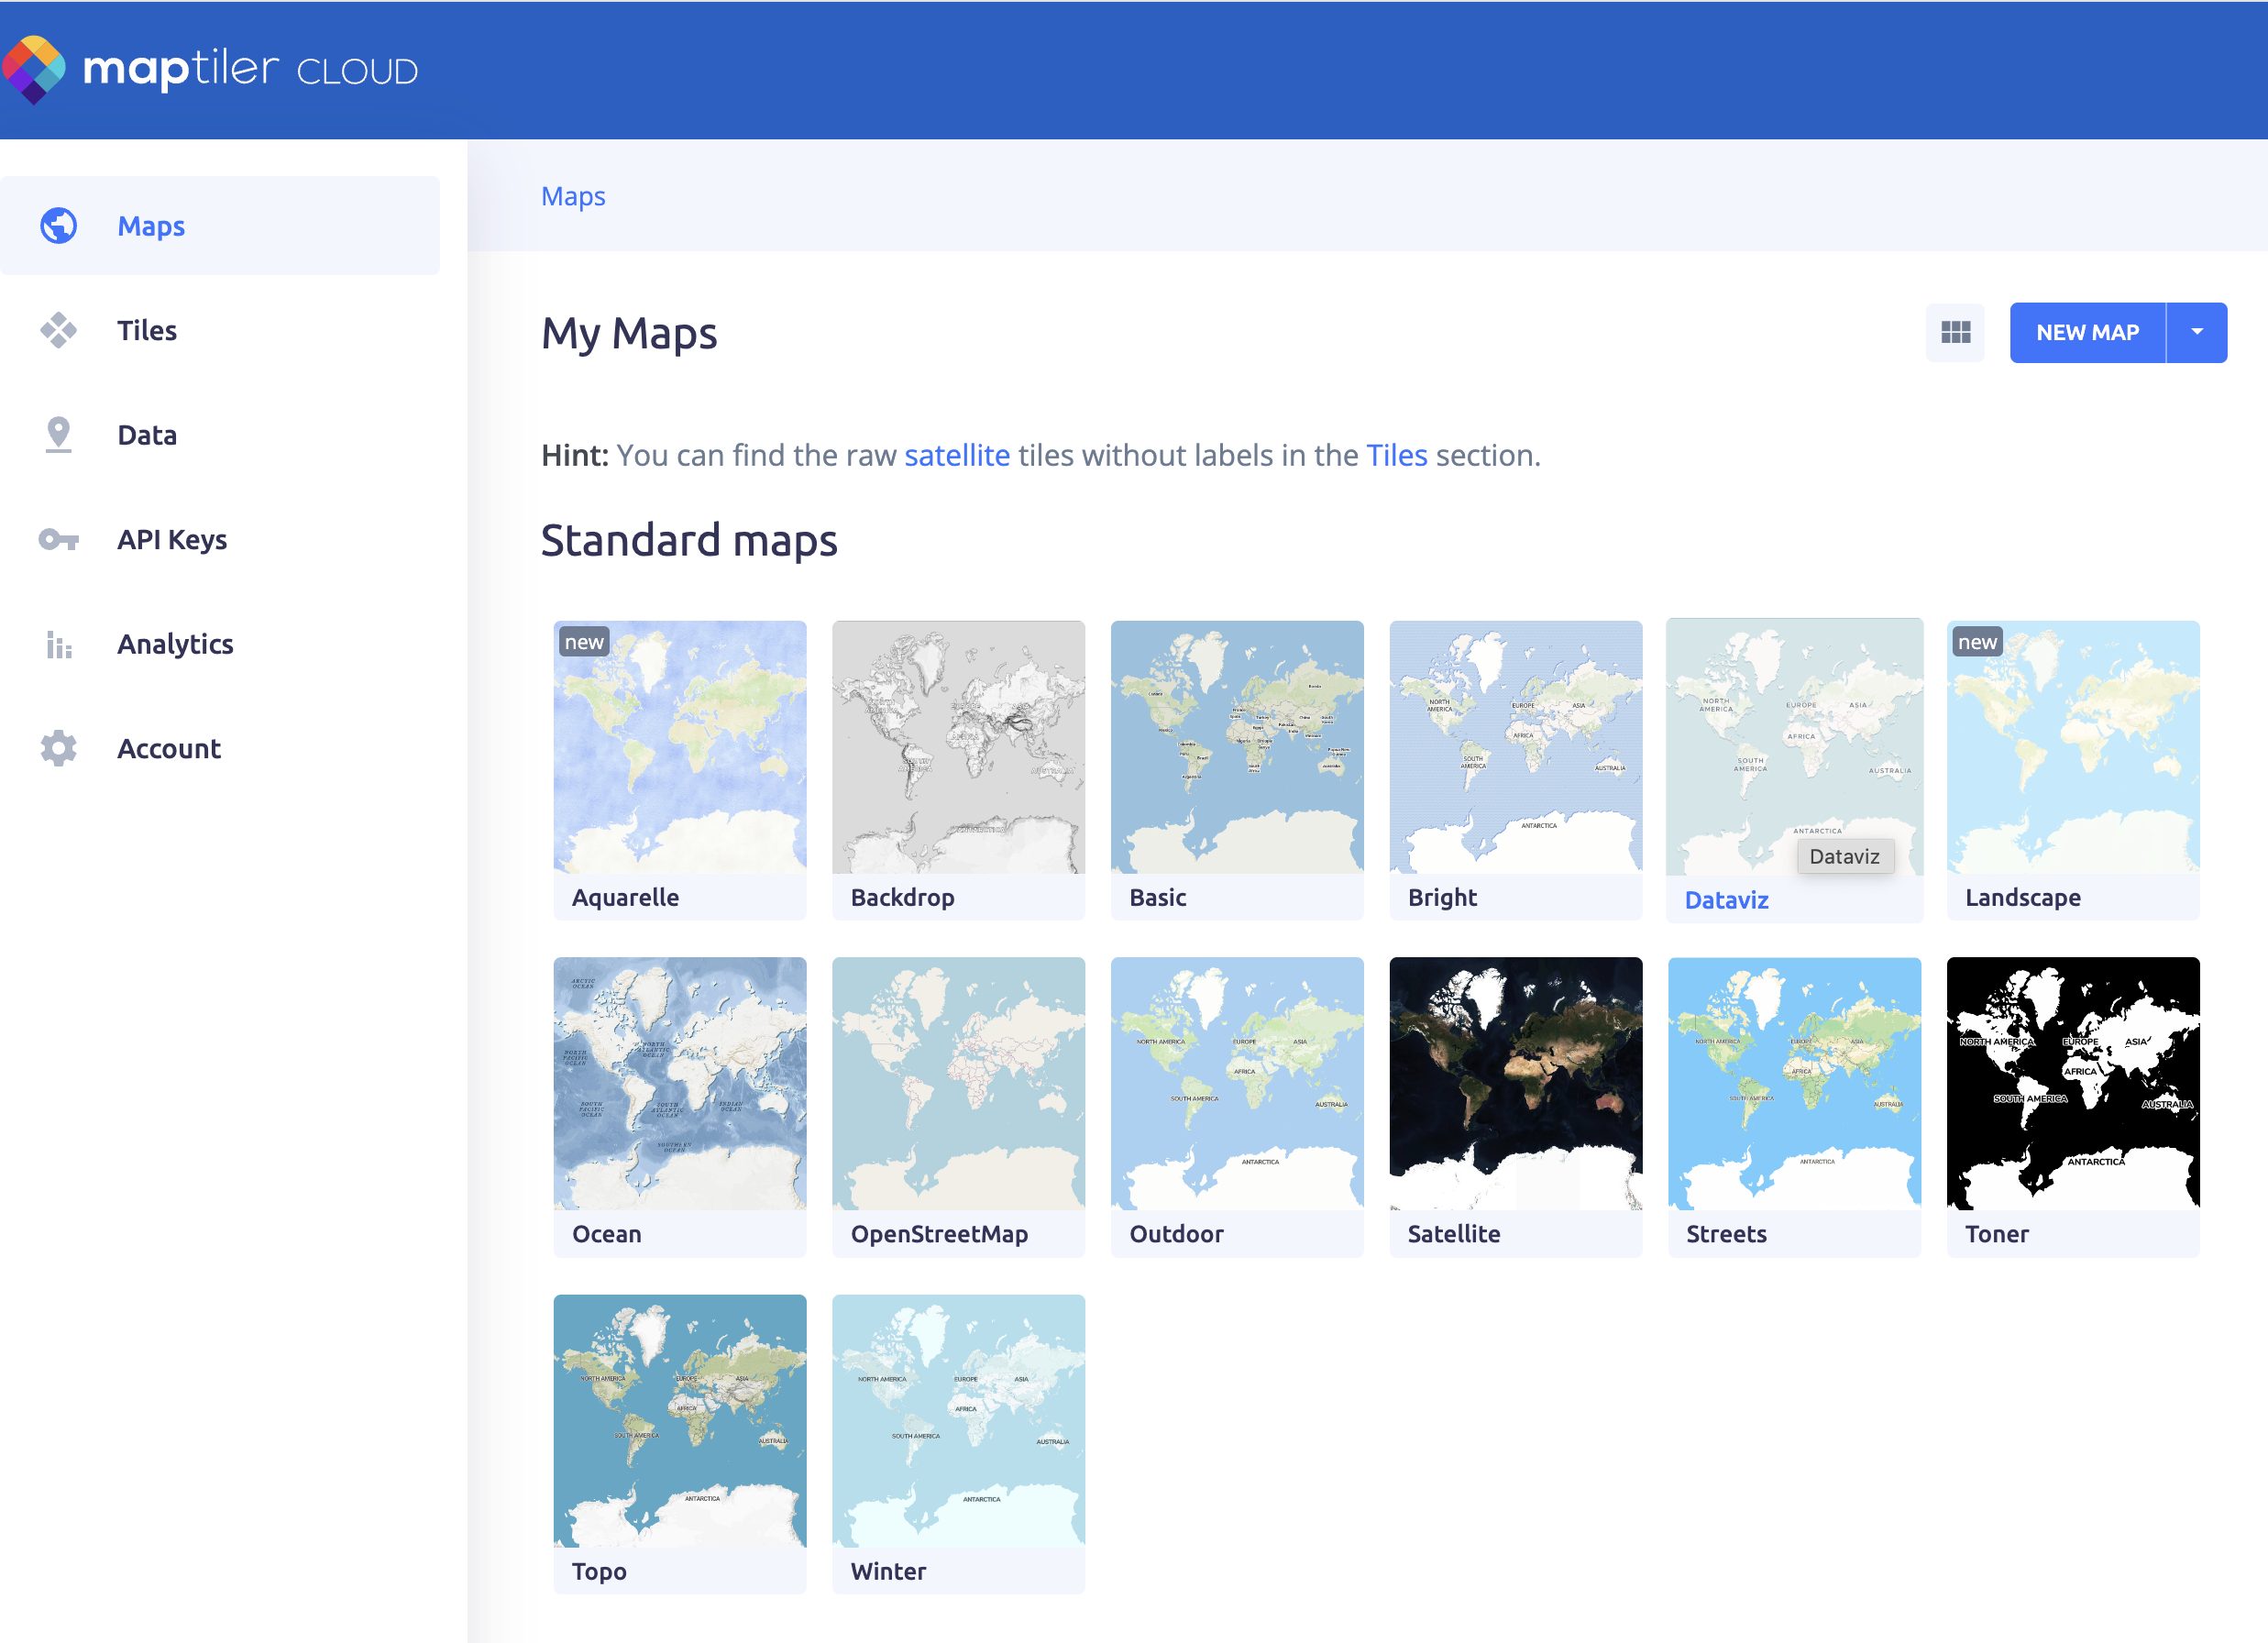
You can create you own styles using MapTiler OpenMapTyles by clicking on the New map button. You can select which layers to display and how.
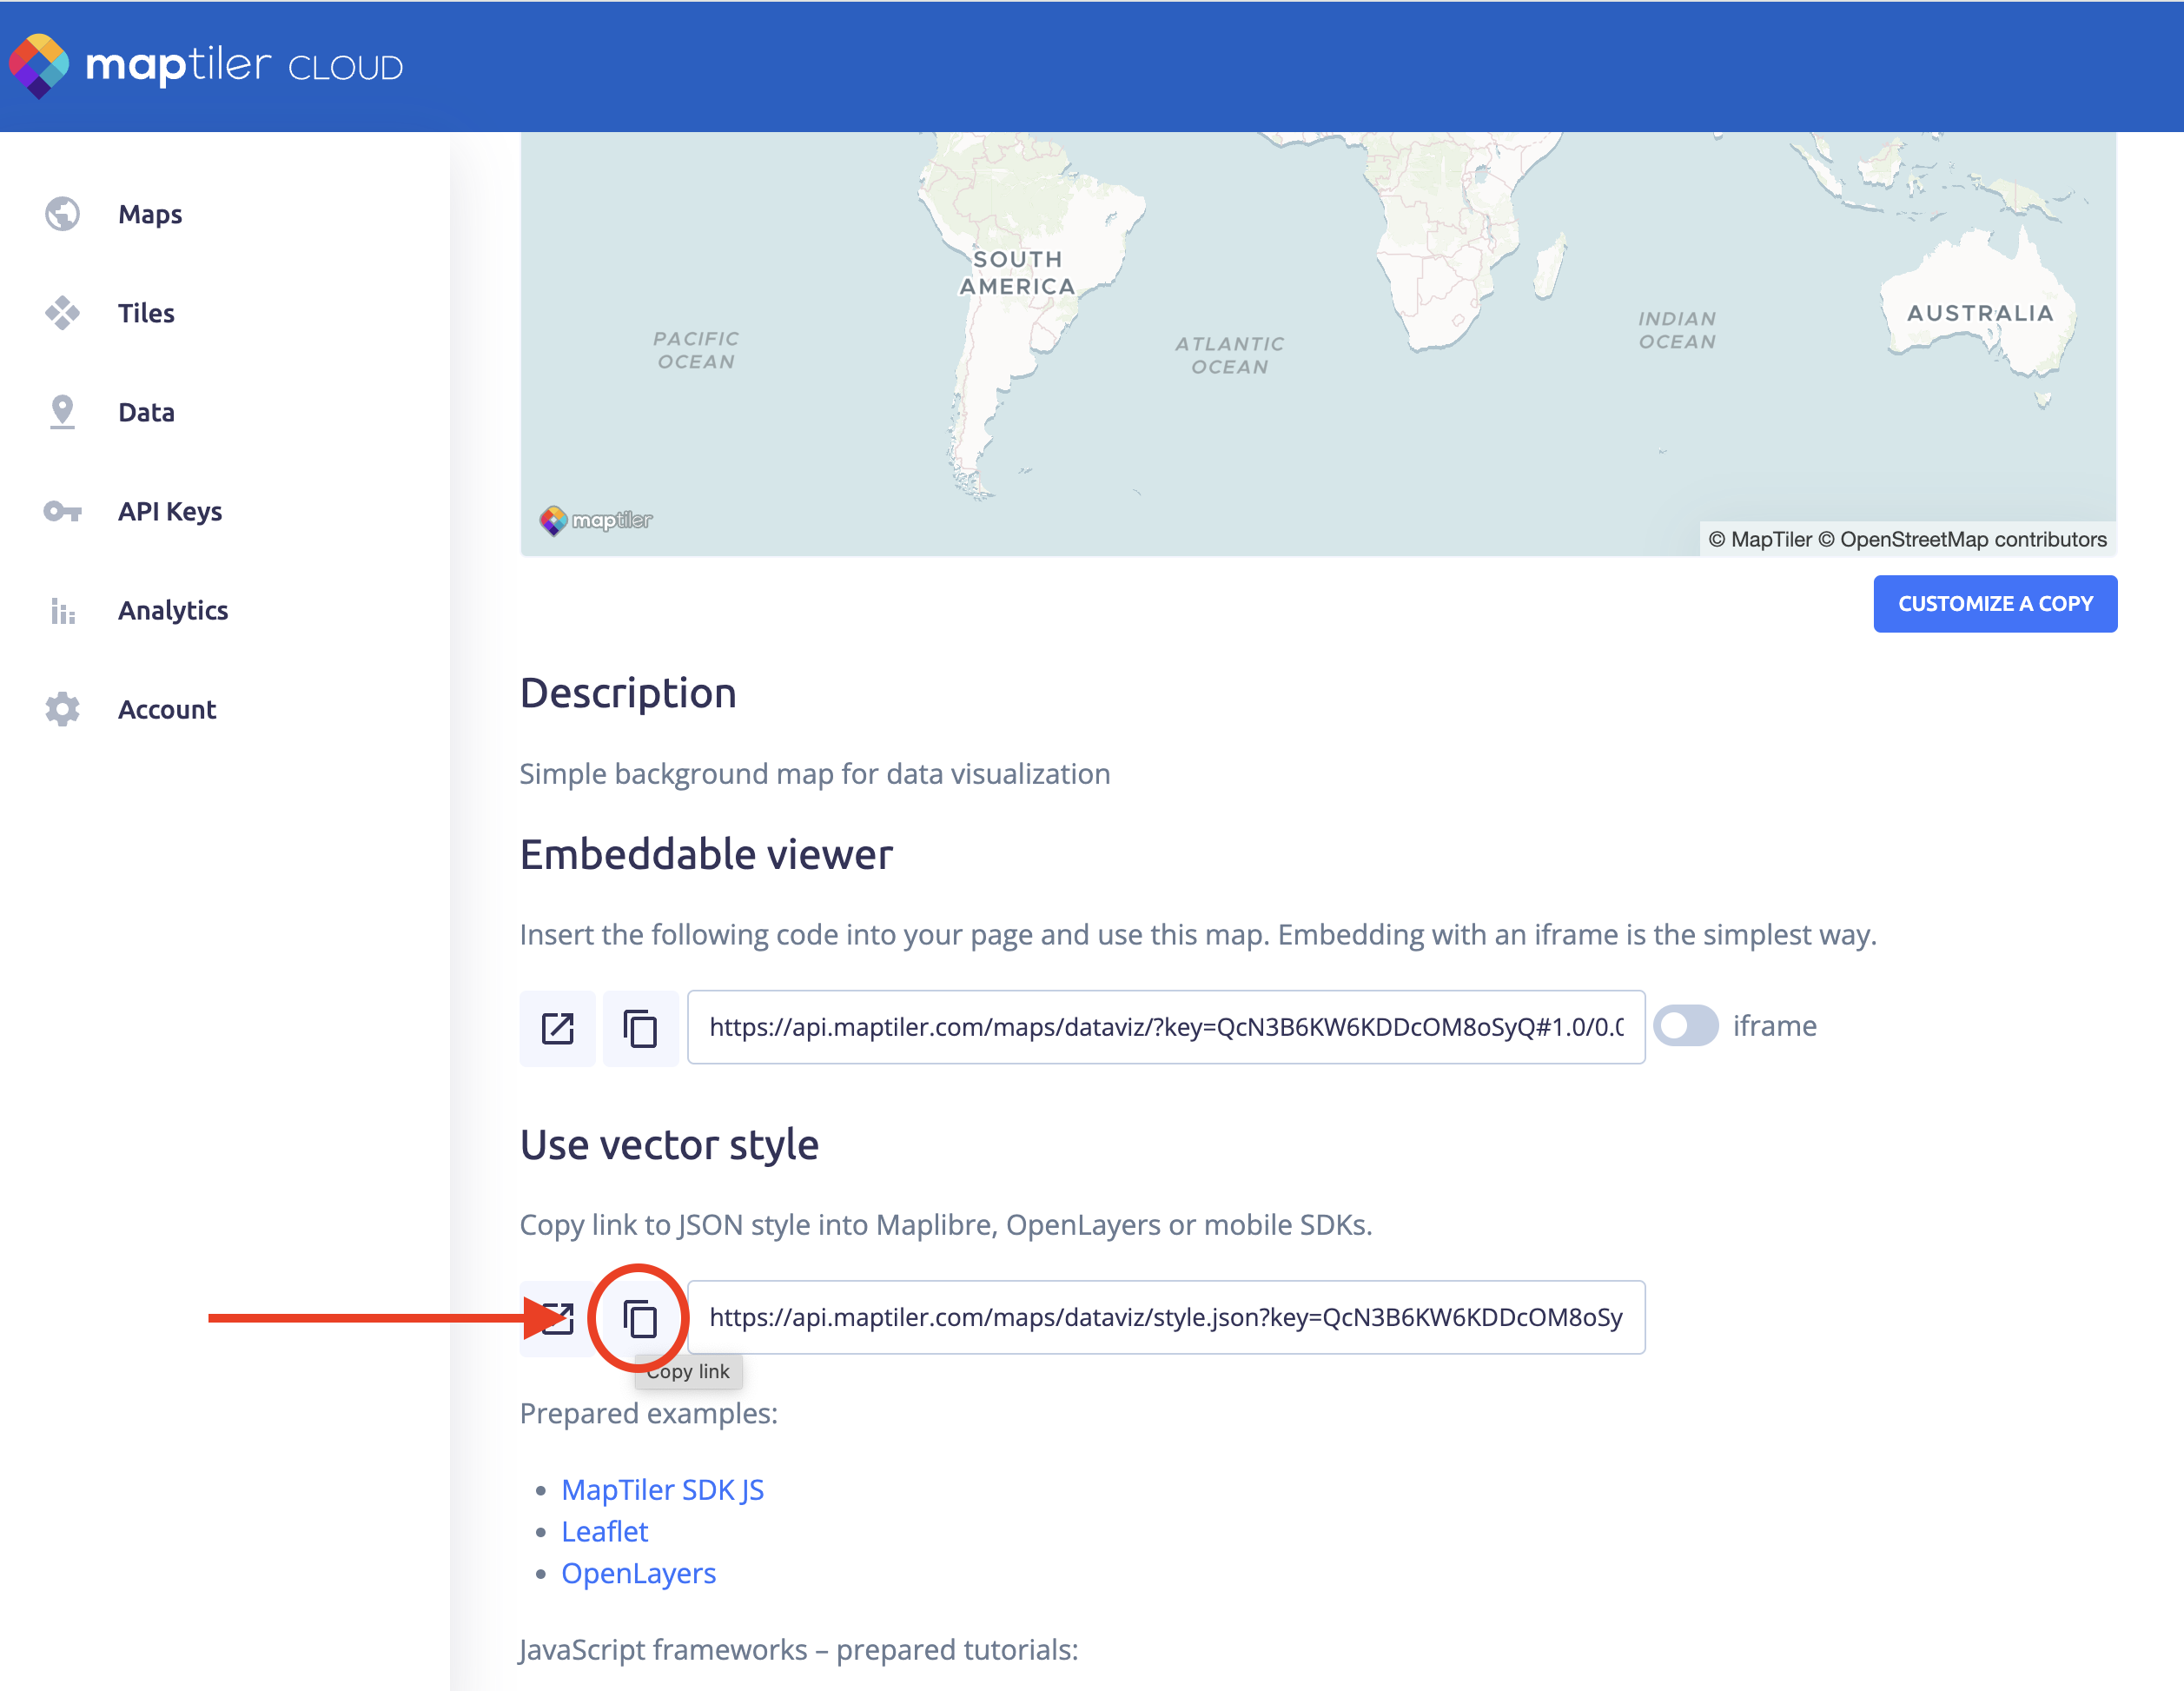
3 Copy the vector style URL
Copy the style URl. You can use the Copy link button.
Be sure to use the vector style that is located under the ‘Use vector style’ title.
4 Paste the style url in the config.js file
Go back to the config.js you have open in Visual Studio Code and paste the URL you just copied in the style: property.
Input
2 style: 'https://api.maptiler.com/maps/dataviz/style.json?key={your_own_key}'
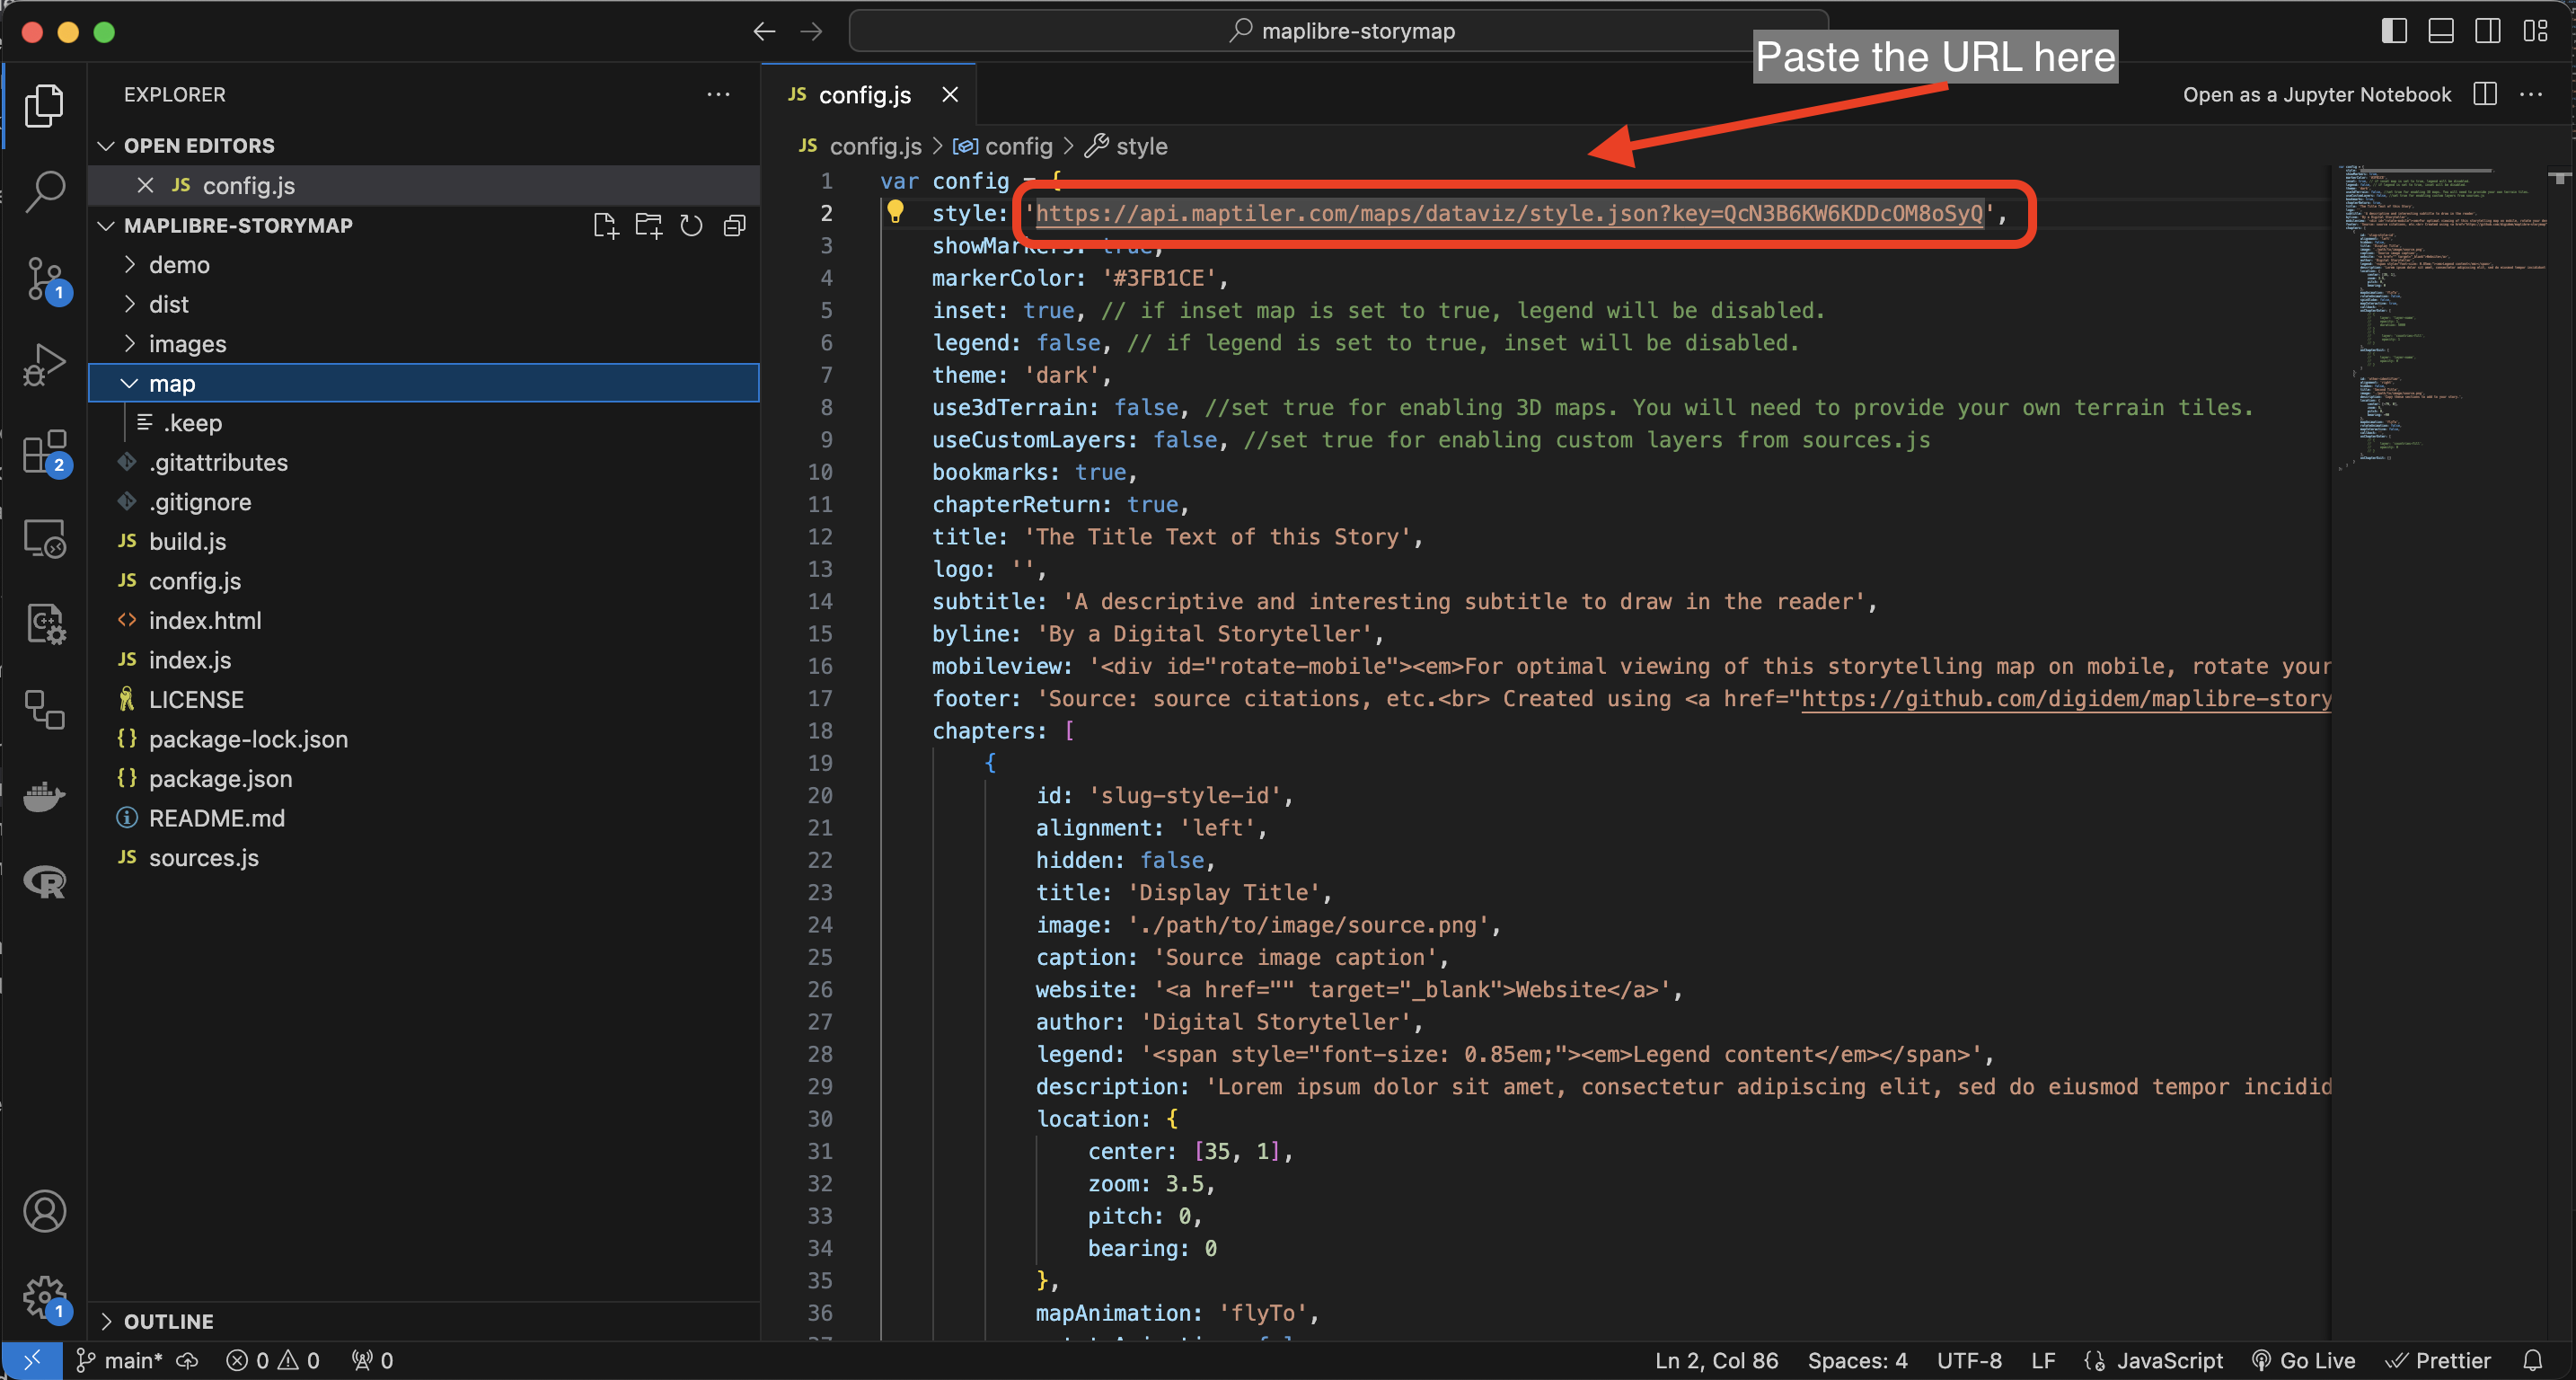
The style can be defined using a URL, like in this demo, or using a .json file. If you create your own style and want to use a json file, you have to save that file in the map folder on the repository and point the style property to it using style: '\map\style.json'. Customized styles can be created and saved as json files in aplications like Maputnik or Mapbox Studio.