Edit Your config.js
First we’re going to make a few quick edits to your new repository’s config.js file. This file contains the story main content and the map controls.
1 Open your repository files in Visual Studio Code.
While on GitHub Desktop, click on the option to Open in Visual Studio Code
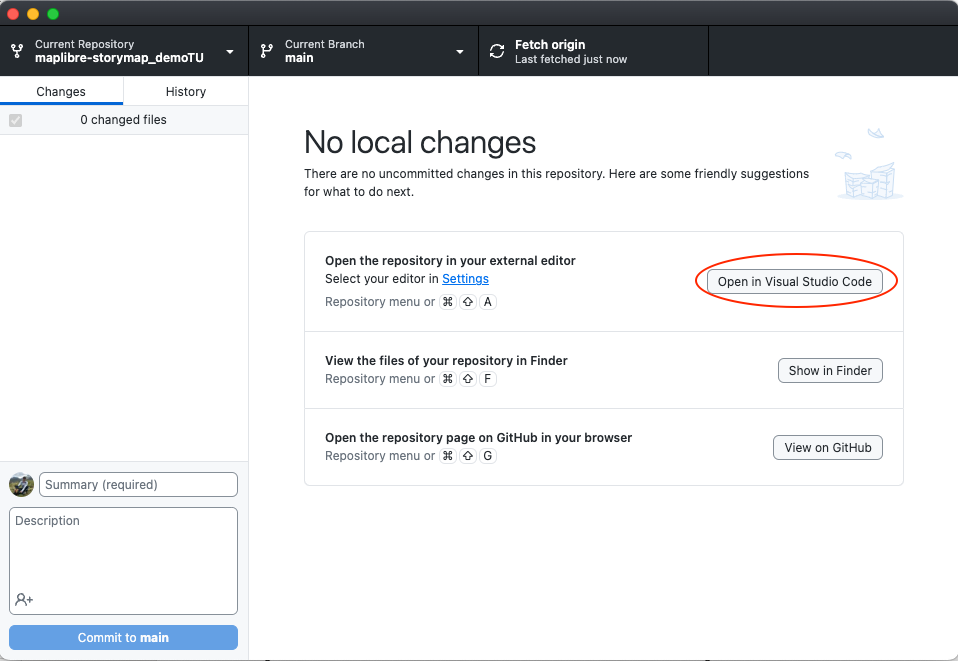
This will open Visual Studio Code.
2 Rename the file.
You are going to see a list with all the files and folders on your repository.
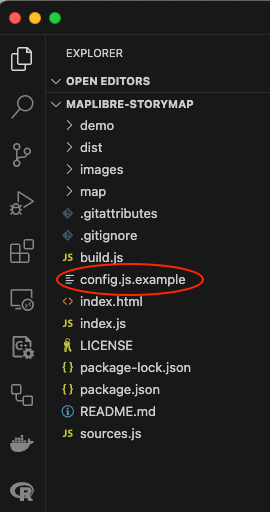
Right click on the file config.js.template and select the Rename option.
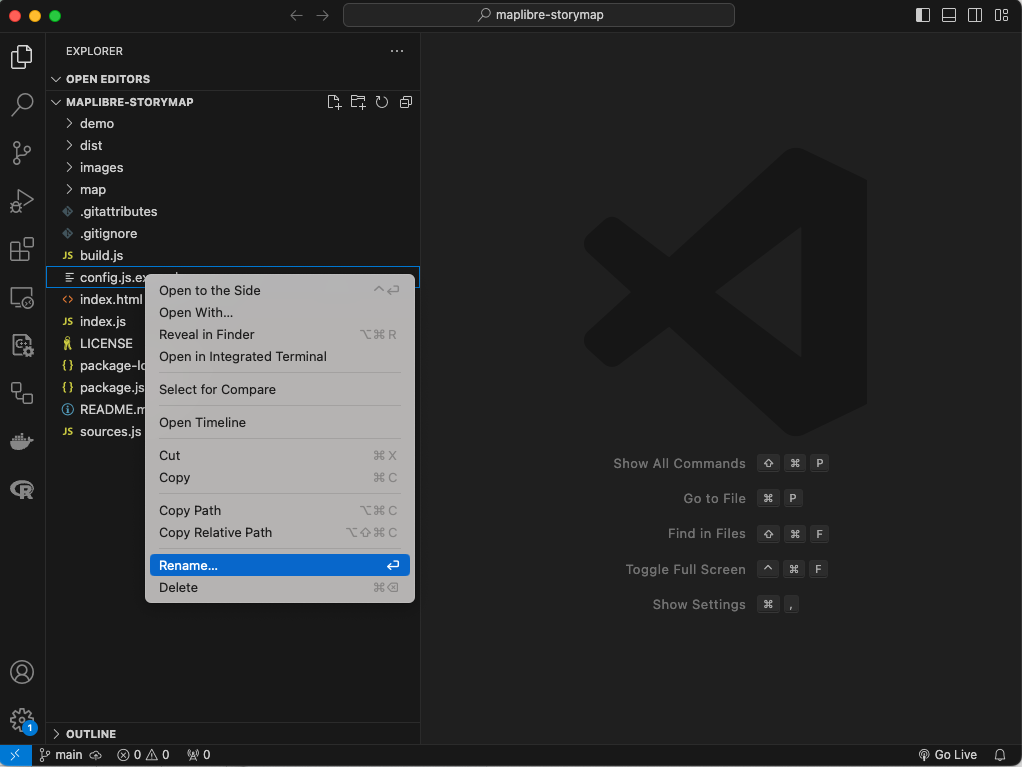
Change the name of the file to config.js, without the word template at the end.
3 Make some edits to your config.js file.
Click on the file you just renamed. Its content will be displayed in the central panel on GitHub Desktop.
The first 17 lines of this file contain the main configurations for your new sotrymap. We are going to cover some of them to get your story map started.
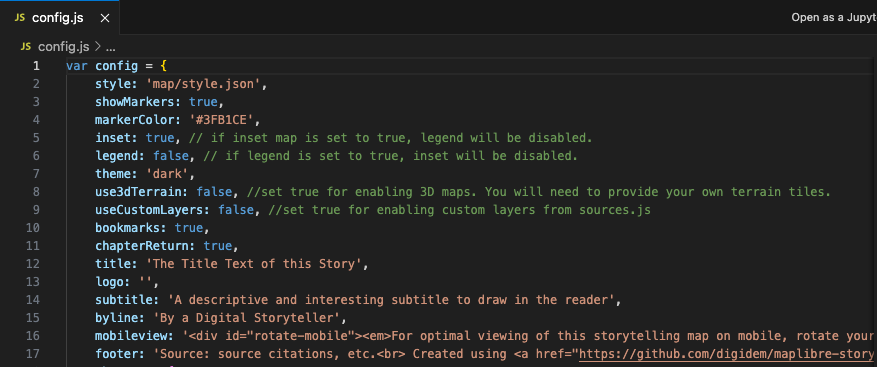
Step 1
Give your map a title by replacing the text after title:
Input
12 title: 'My first StoryMap'
Be aware that al these properties are build by a pair of values. Values other than boolean (true,flase) should be between ``.
Step 2
Insert a subtitle for your story map. Type any text you want to be in the subtitle. Remember that it should be between ``.
Input
14 subtitle: 'This is the most amazing story map ever made!'
Step 3
Put your name as the author of the story map by changing the text of the byline property.
Input
15 byline: 'Felipe Valdez'
Step 4
Add aditional information to your story map in the footer property. This is a spot you can use to attribute the data or mention any organizations involved in the making of the map. Also, it is a good practice to keep the MapLibre Storytelling and the link to the project as it is after <br>.
Input
17 footer: 'Source: Temple Unievrsity Libraries<br> Created using <a href="https://github.com/digidem/maplibre-storymap" target="_blank">MapLibre Storytelling</a> template.',
Most of this properties allow HTML formated text. This means you can add different styles, links and other features. If you want to learn more about HTML follow this link.
More Additional properties and their functionality.
The rest of the properties in this section allow you to change some other aspects of the story map. we will cover the style property in the next section. The other properties are described below.
| Property | Function |
|---|---|
style: | This is the MapLibre style to use for the app. You can set this to any MapLibre style hosted online or locally, but by default it is set to look for a style in the map/ directory. |
showMarkers: | This controls whether markers are shown at the centerpoint of each chapter. If true, the map will display a default blue, inverted-teardrop icon. |
markerColor: | If showMarkers is true, this property will override the default light blue marker color. |
inset: | Shows an inset mini-map. Will be disabled is legend is set to true. |
legend: | Shows a box at the bottom right in which you can add HTML content for each chapter, serving as a legend. Will be disabled is inset is set to true. |
theme: | Two basic themes (light and dark) are available. |
Optional properties
| Property | Function |
|---|---|
use3dTerrain | Enables 3D terrain. You will need to provide your own terrain tiles. |
useCustomLayers: | Enables adding custom sources and layers as defined in sources.js. |
bookmarks: | Enables adding bookmark links in the header and footer for each chapter. Bookmarks will be added for any chapter that has a title. |
chapterReturn: | To enable a “Return to Top” link at the bottom of each chapter. |
logo: | Add a logo image to the header of your story. |
mobileview: | Displays a helpful note to rotate the device when viewing the story map on a mobile. This is HTML content and can be modified in config.js. |
Source: MapLibre Storytelling - Digital Democracy.