Deploy your story map as a web page
Now that your story map is finished, it is time to deploy it as a web page. For that we will use GitHub pages.
GitHub Pages is a static site hosting service that takes HTML, CSS, and JavaScript files straight from a repository on GitHub, optionally runs the files through a build process, and publishes a website.
To publish your map as a web page follow this steps:
Step 1
Go to GitHub cloud and sign in to your account.
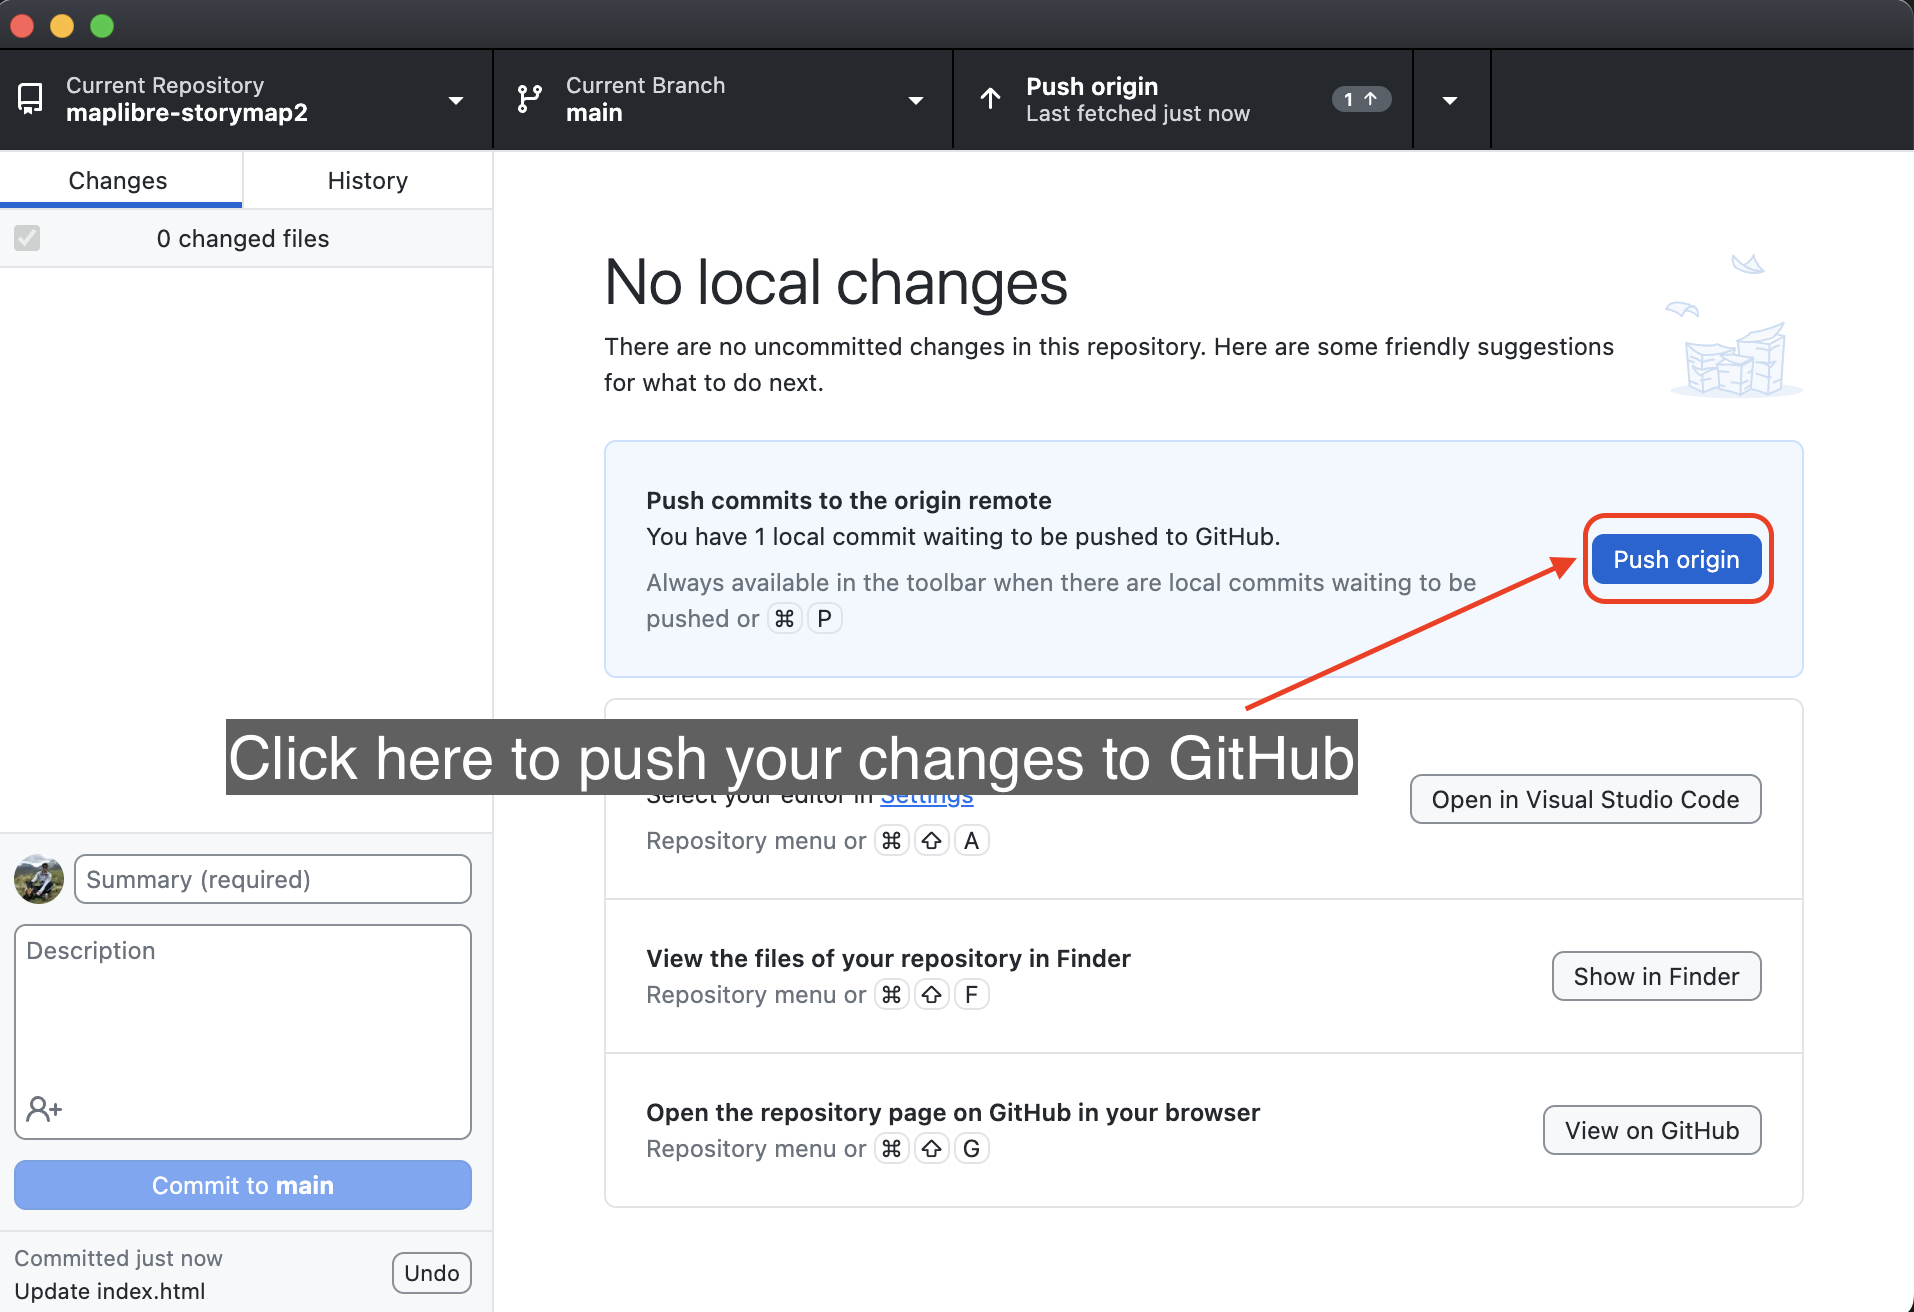
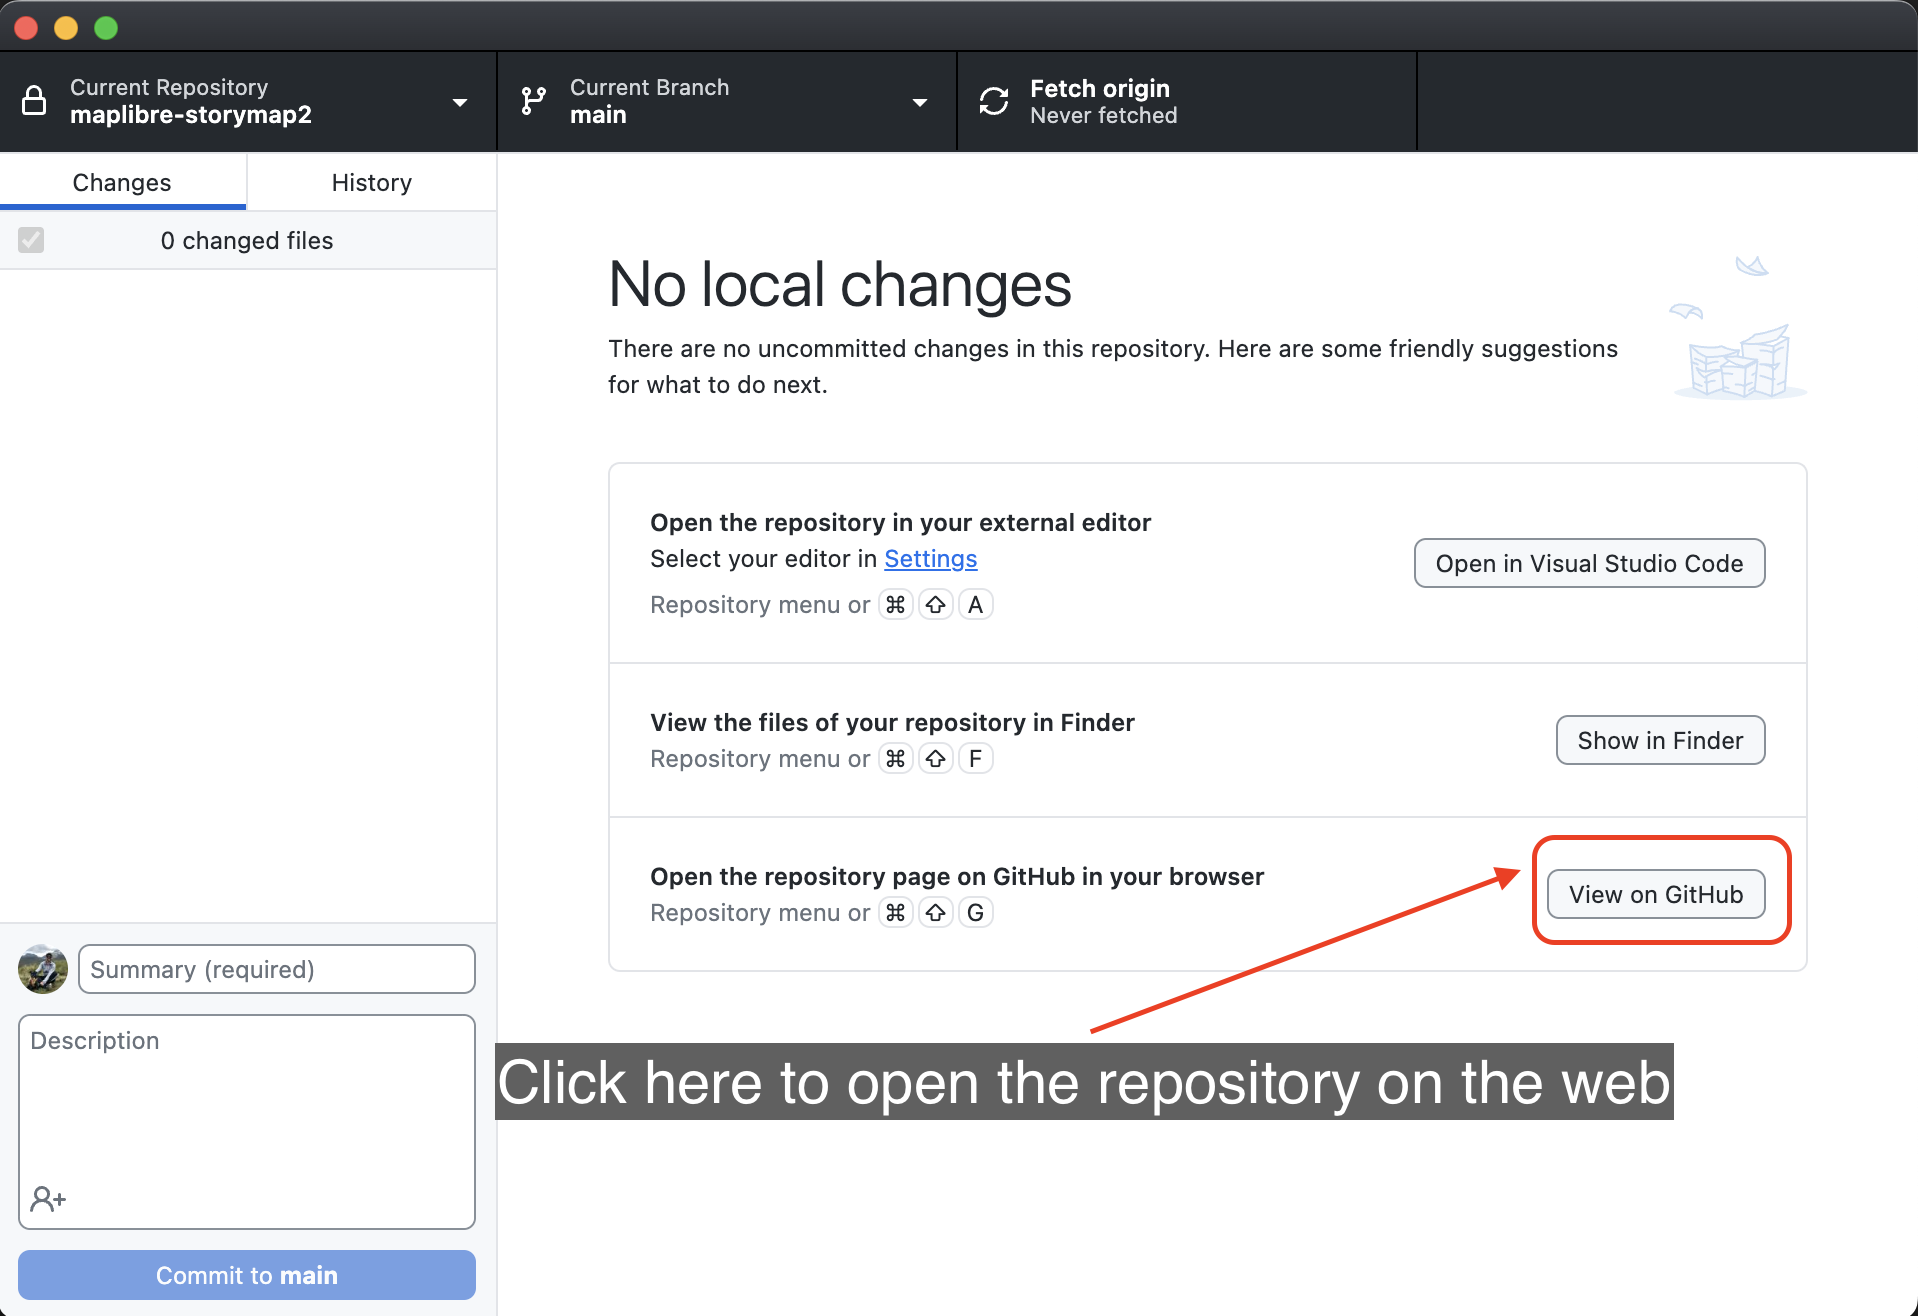
You can click on the View on GitHub button on your GitHub Desktop app to open the repository on your browser.
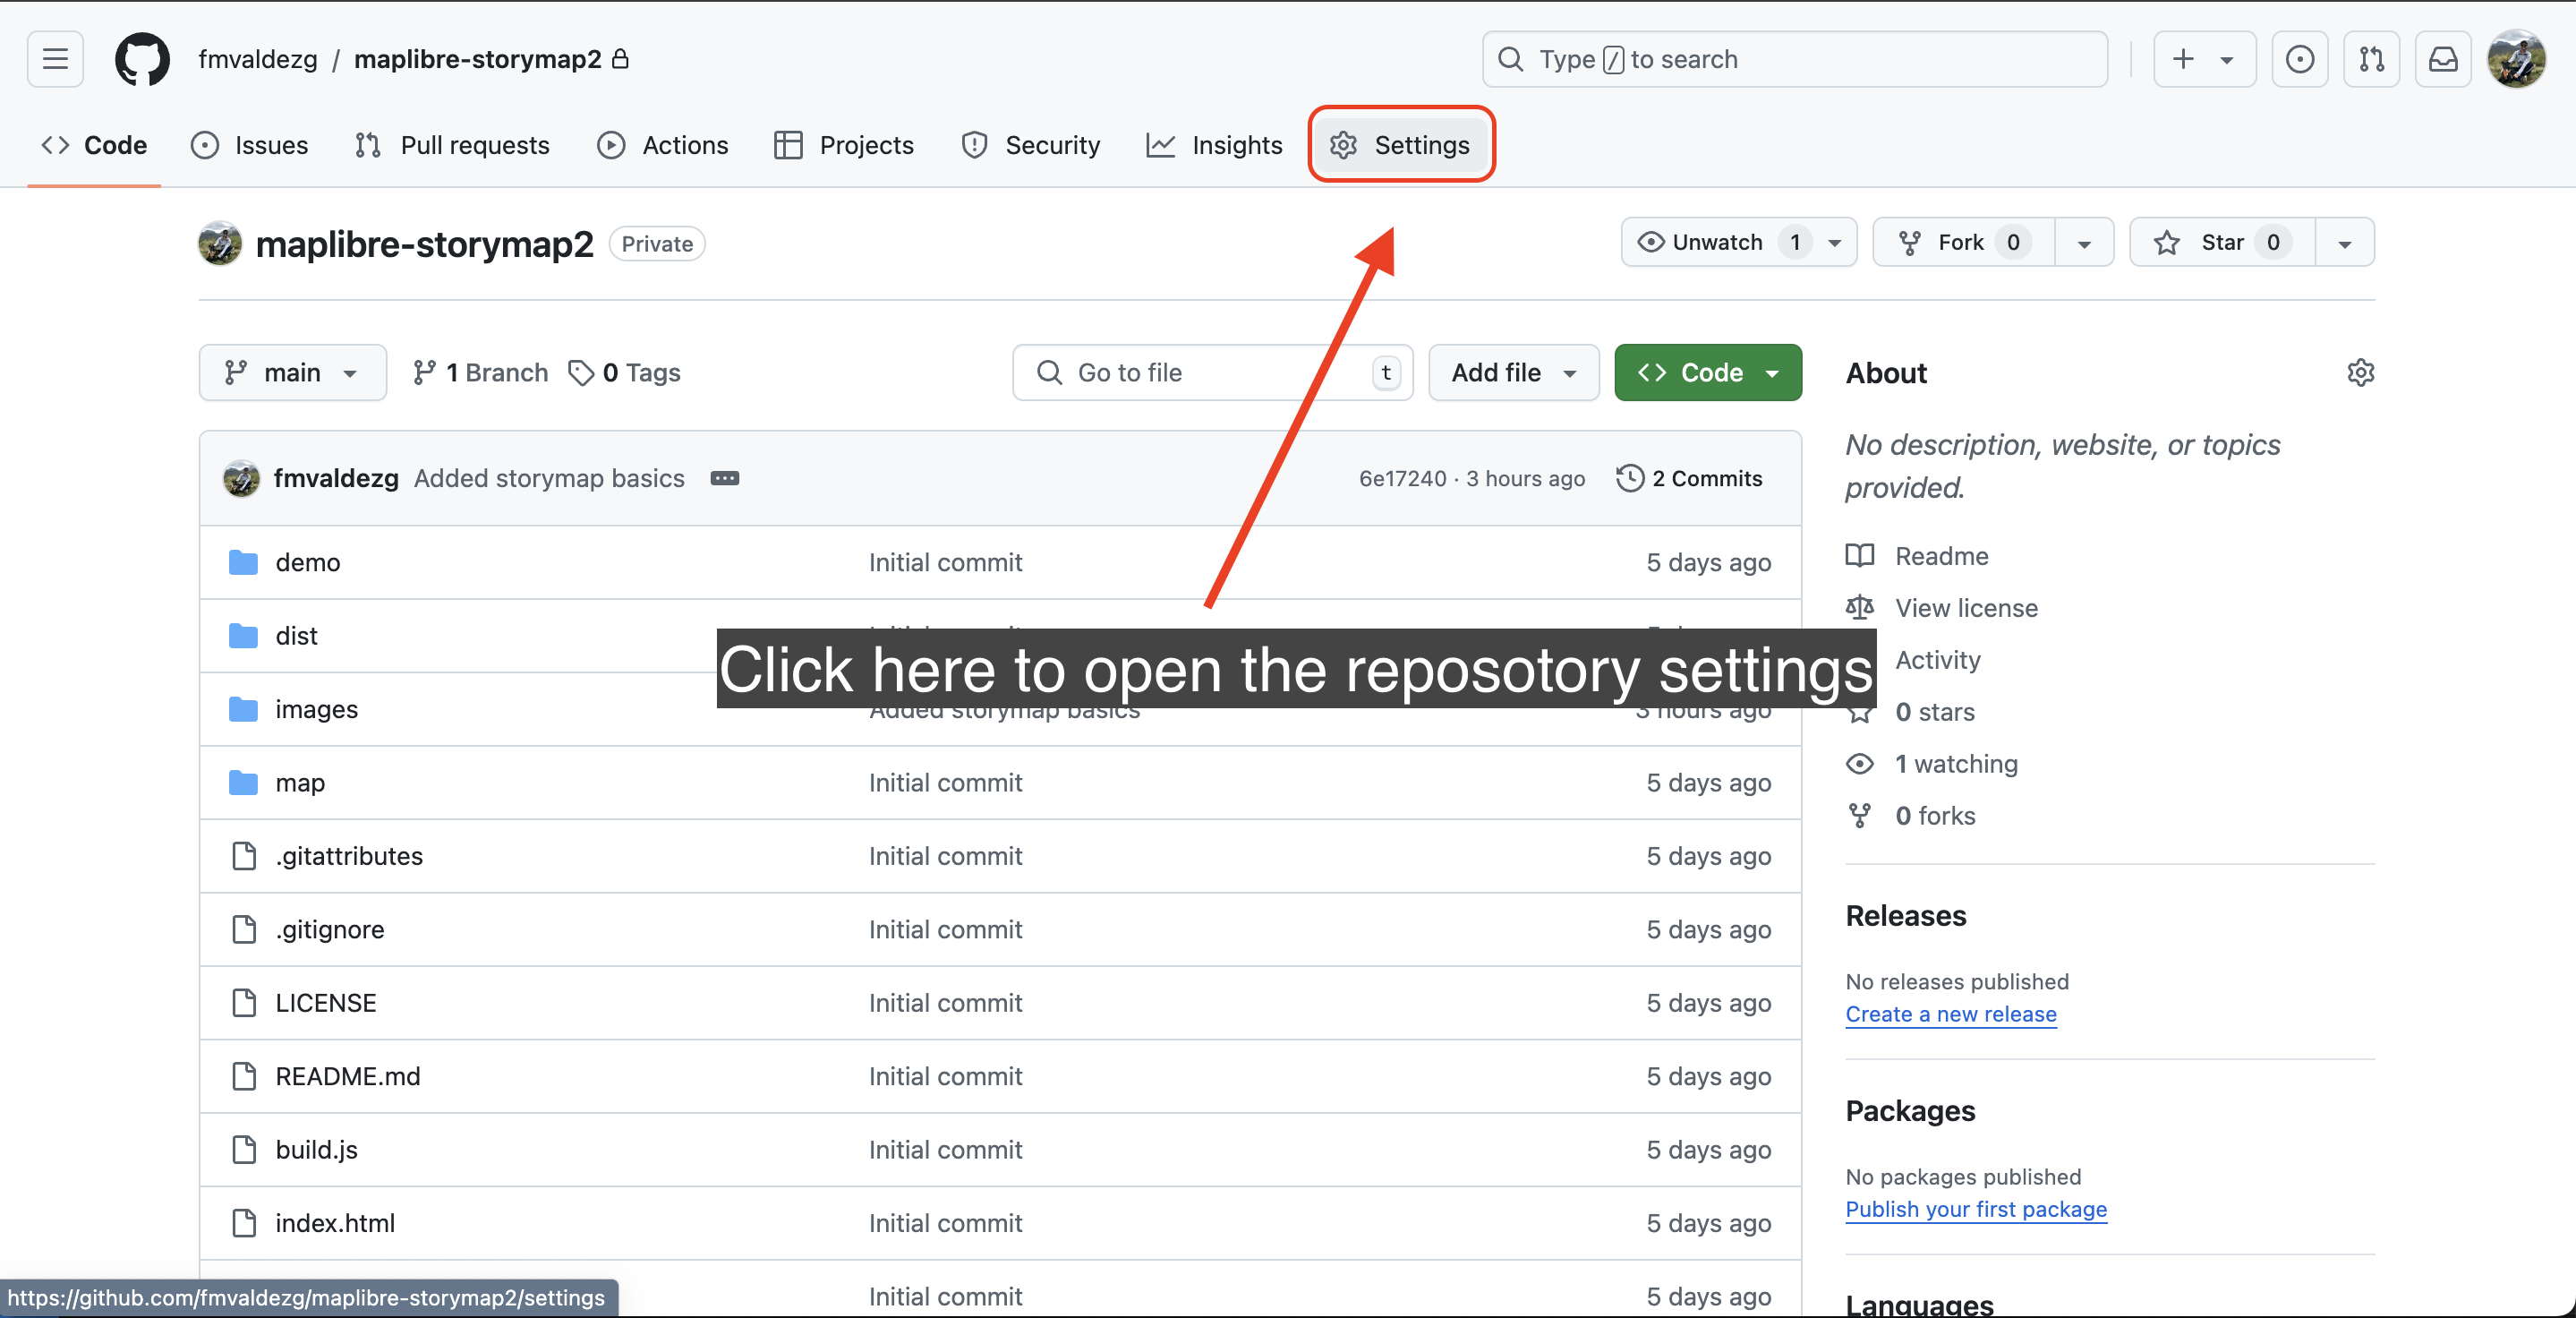
Step 2
On your repository, click on the Settings button on the top menu bar.
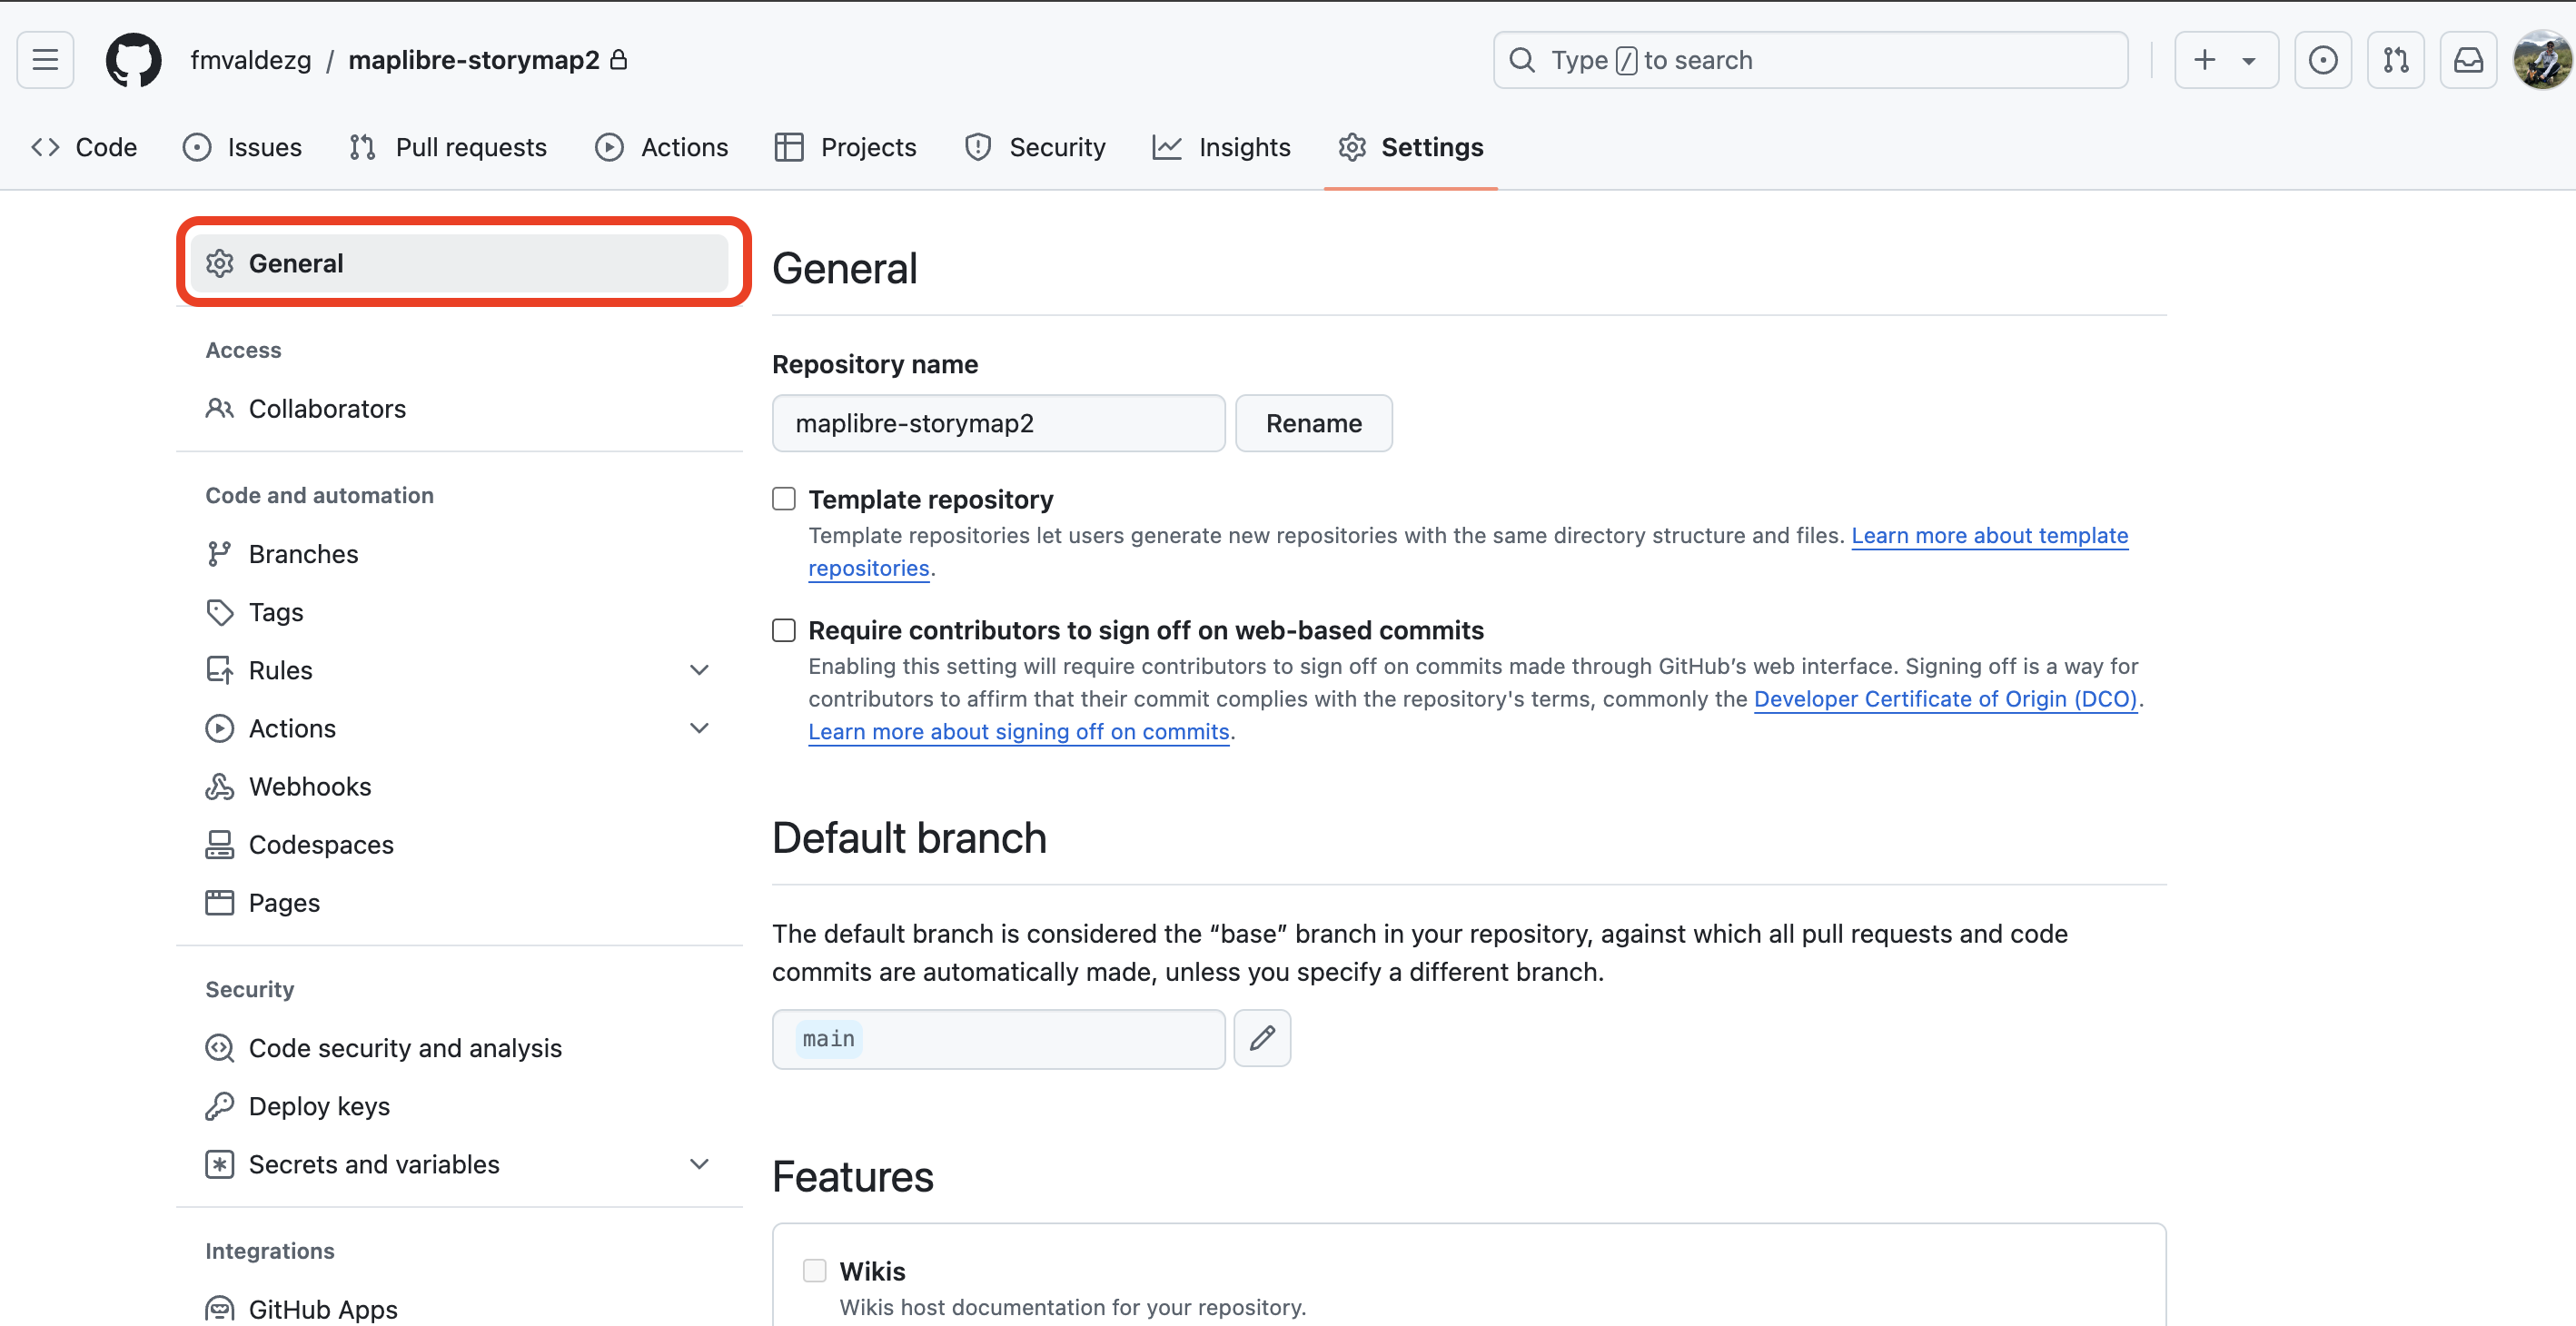
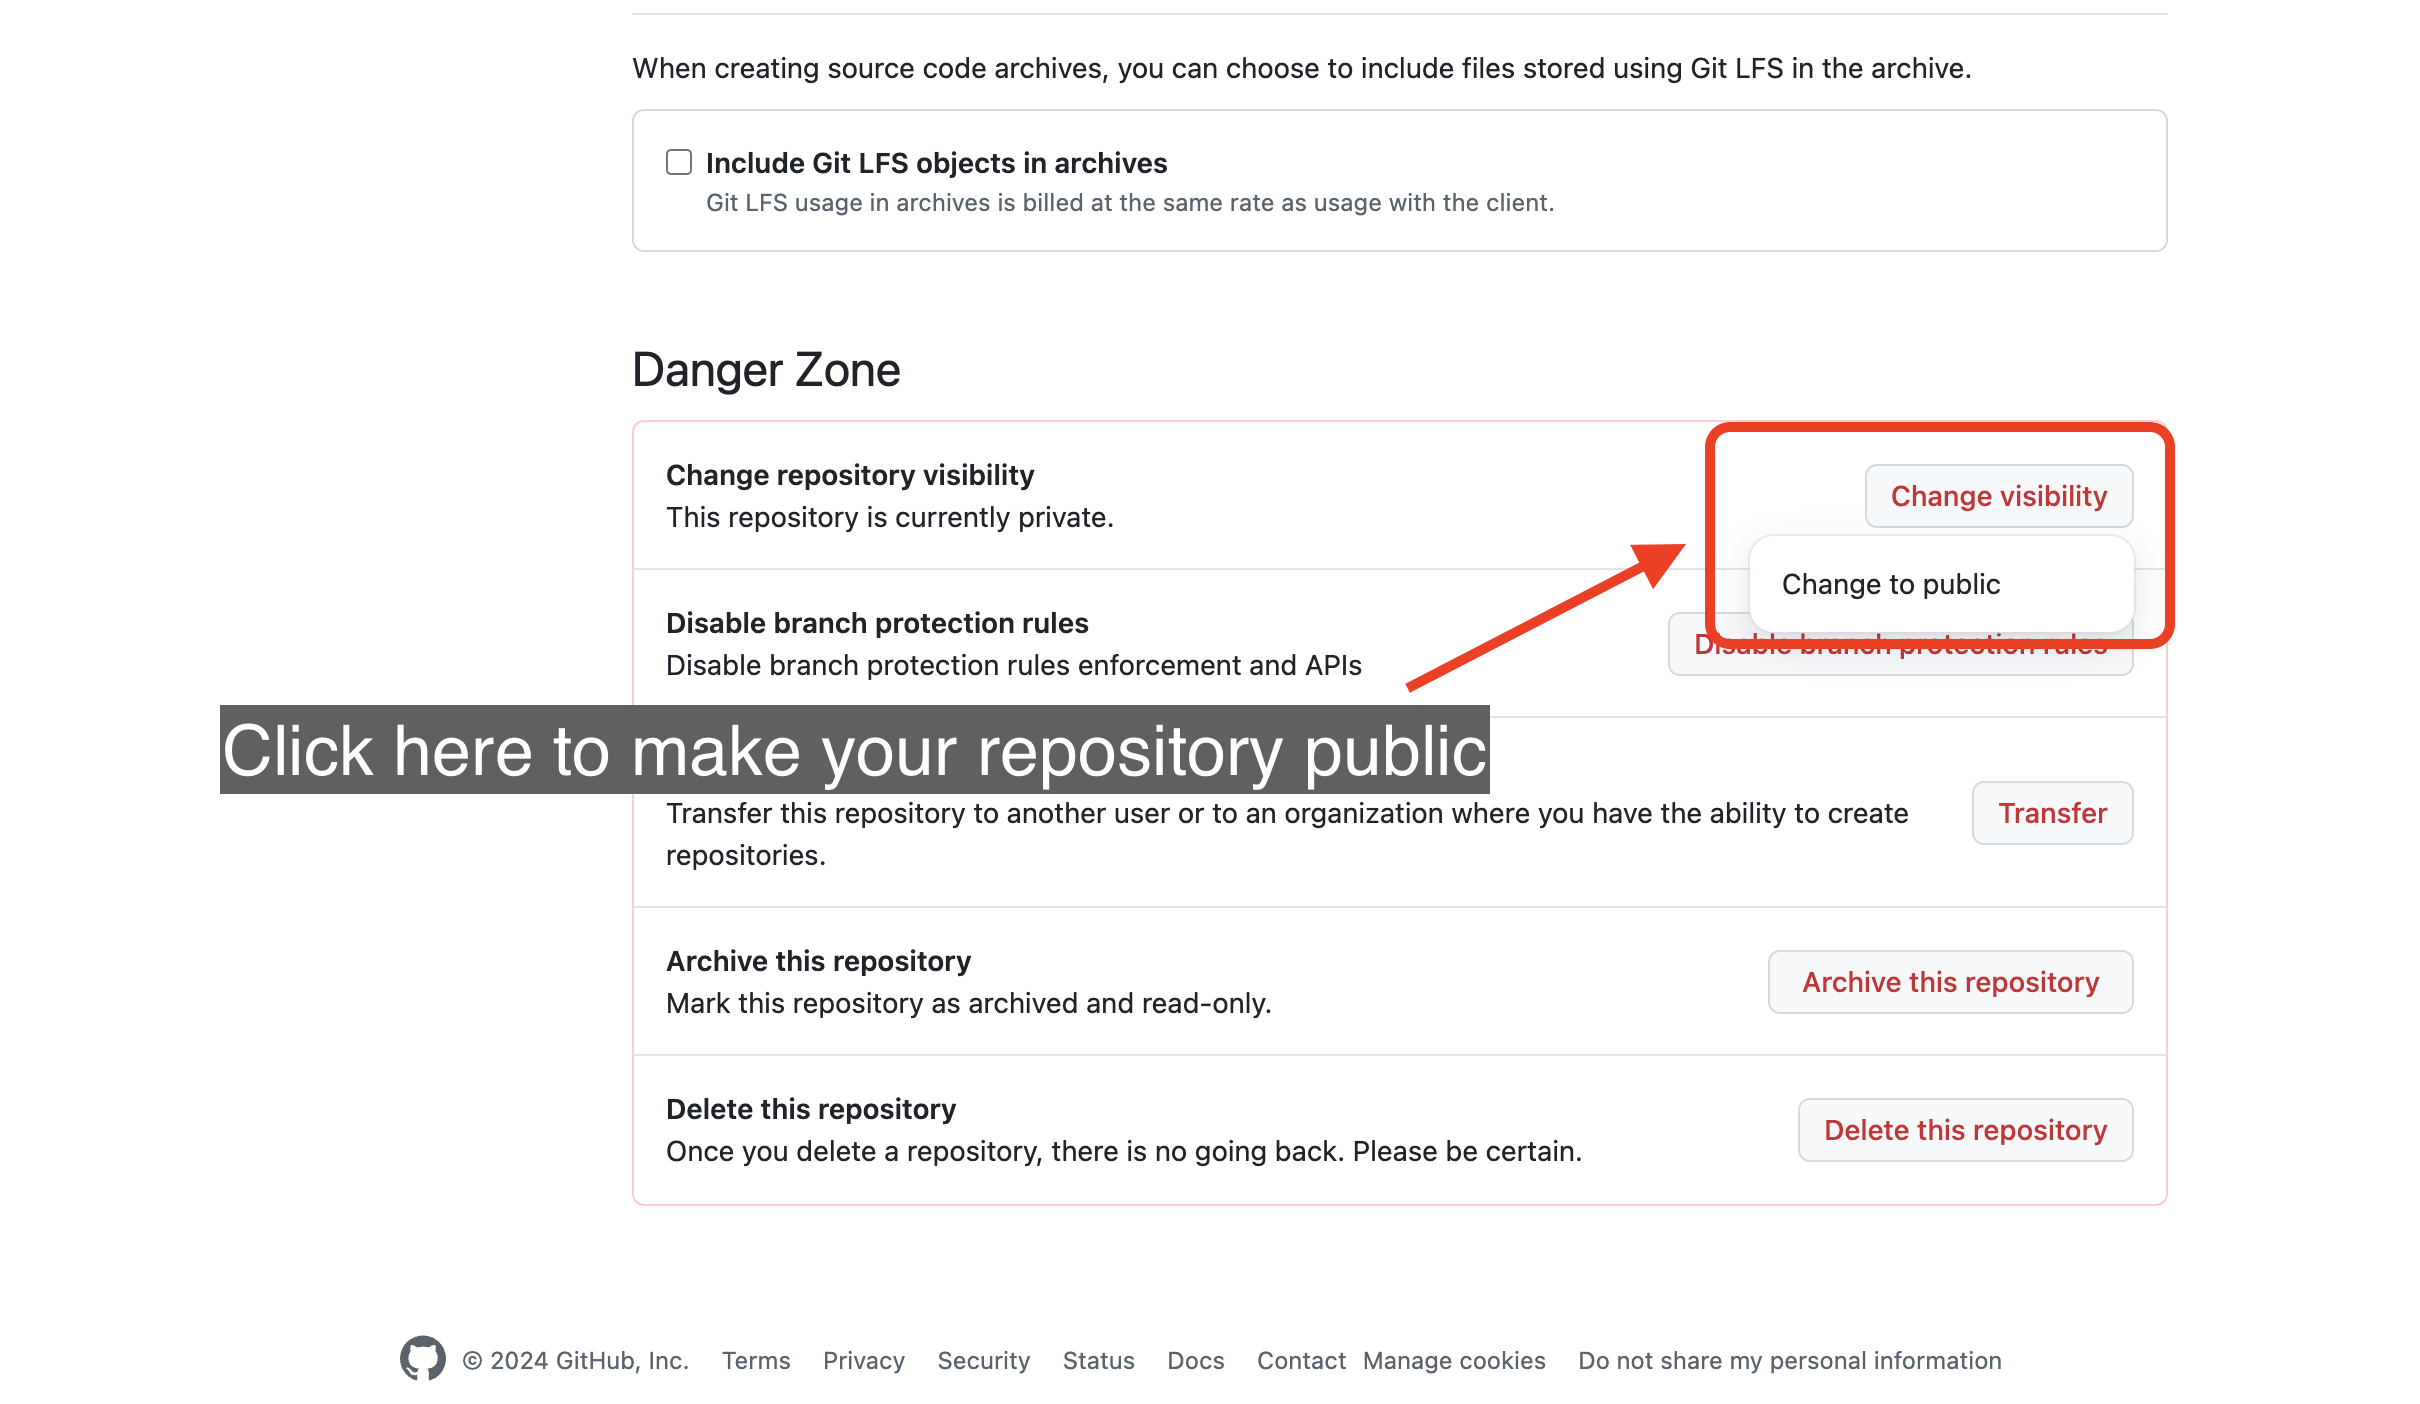
Step 3
If you did not before, you will have to make your repository public in order to use GitHub pages.
Simply click on the General button on the panel on the left.
Scroll down to the bottom of the page and click on Change visibility and then on Change to public.
Confirm that you want to make the repository public.
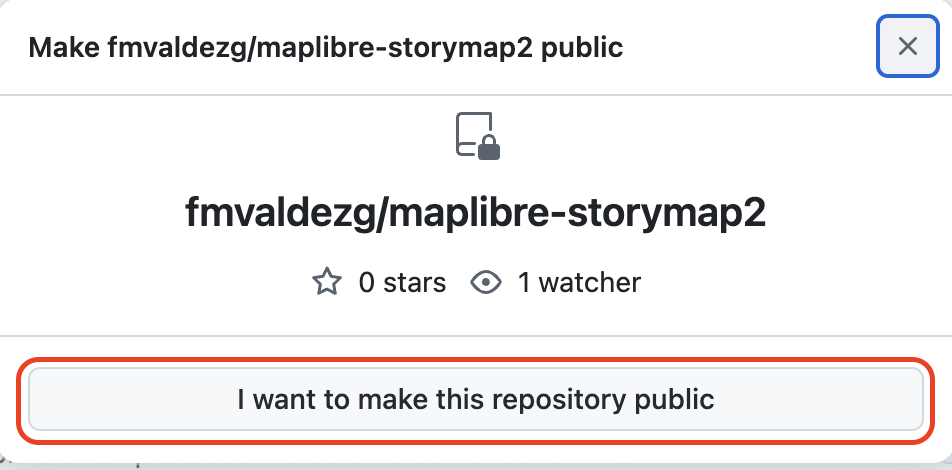
You might be asked to enter your account password to confirm.
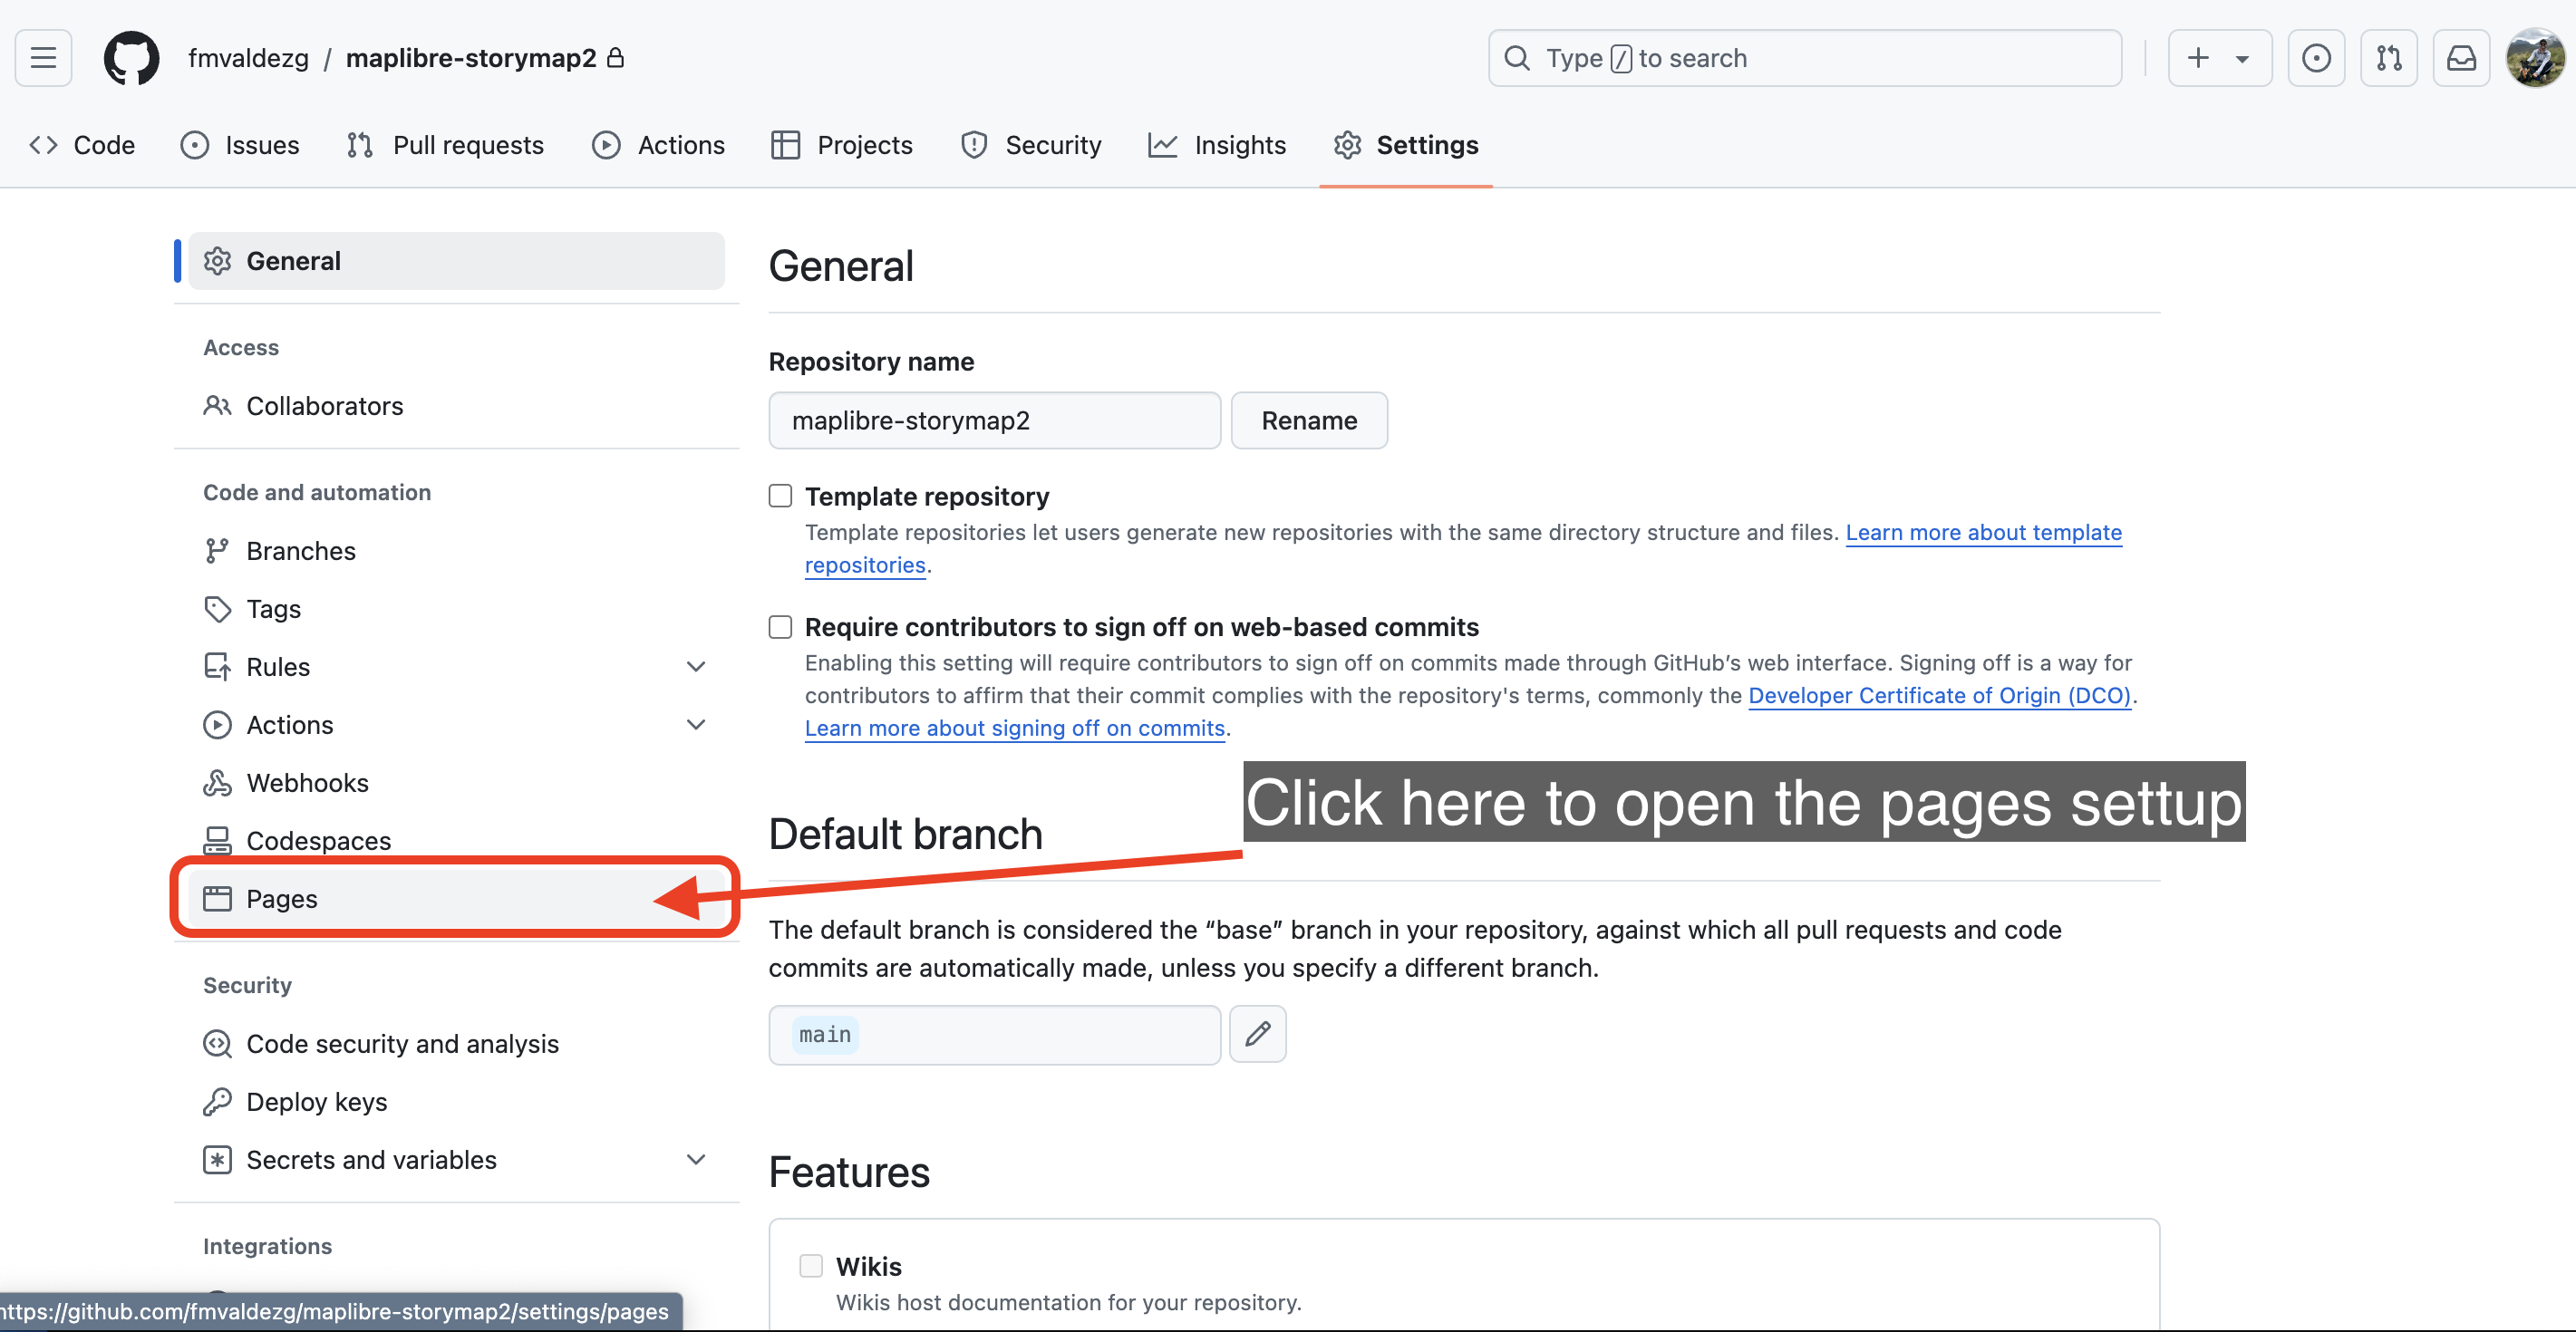
Step 4
On the repository Settings, click on the Pages button on the left panel options.
Step 5
On the Pages settings, click on the dropdown menu under the title Branch and select the main bramch option.
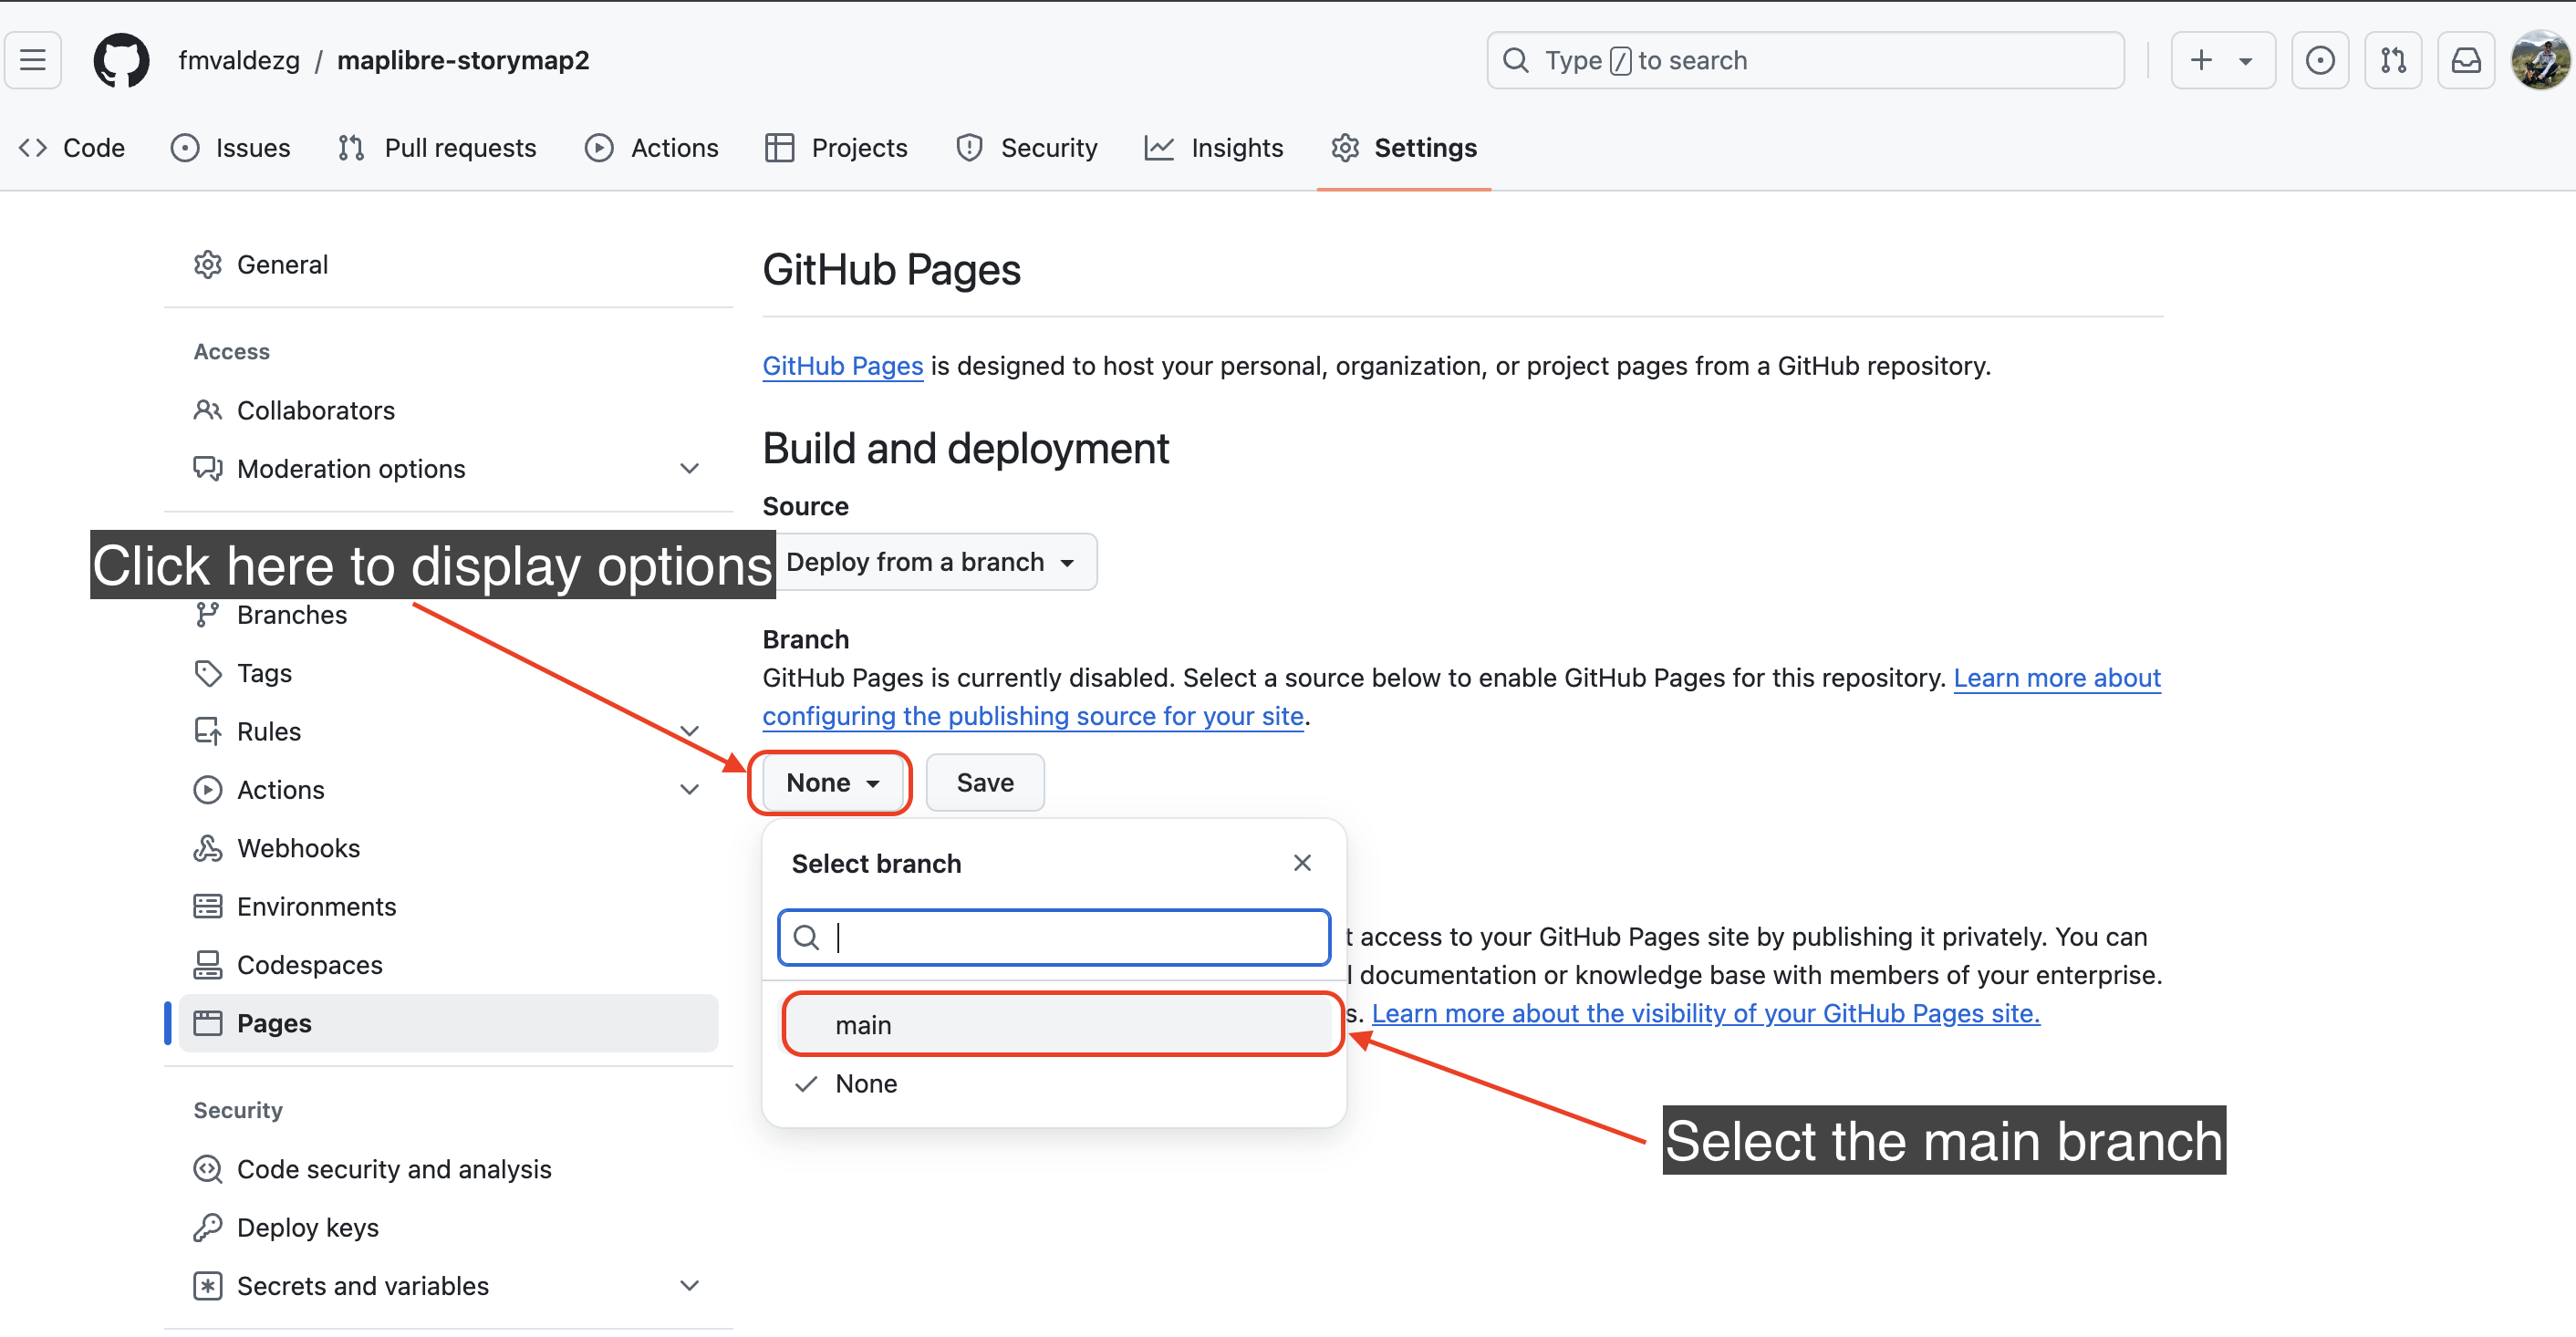
Then click on Save. A message like the one below will appear on the screen.

Step 6
Wait a couple some seconds and the refresh the page.
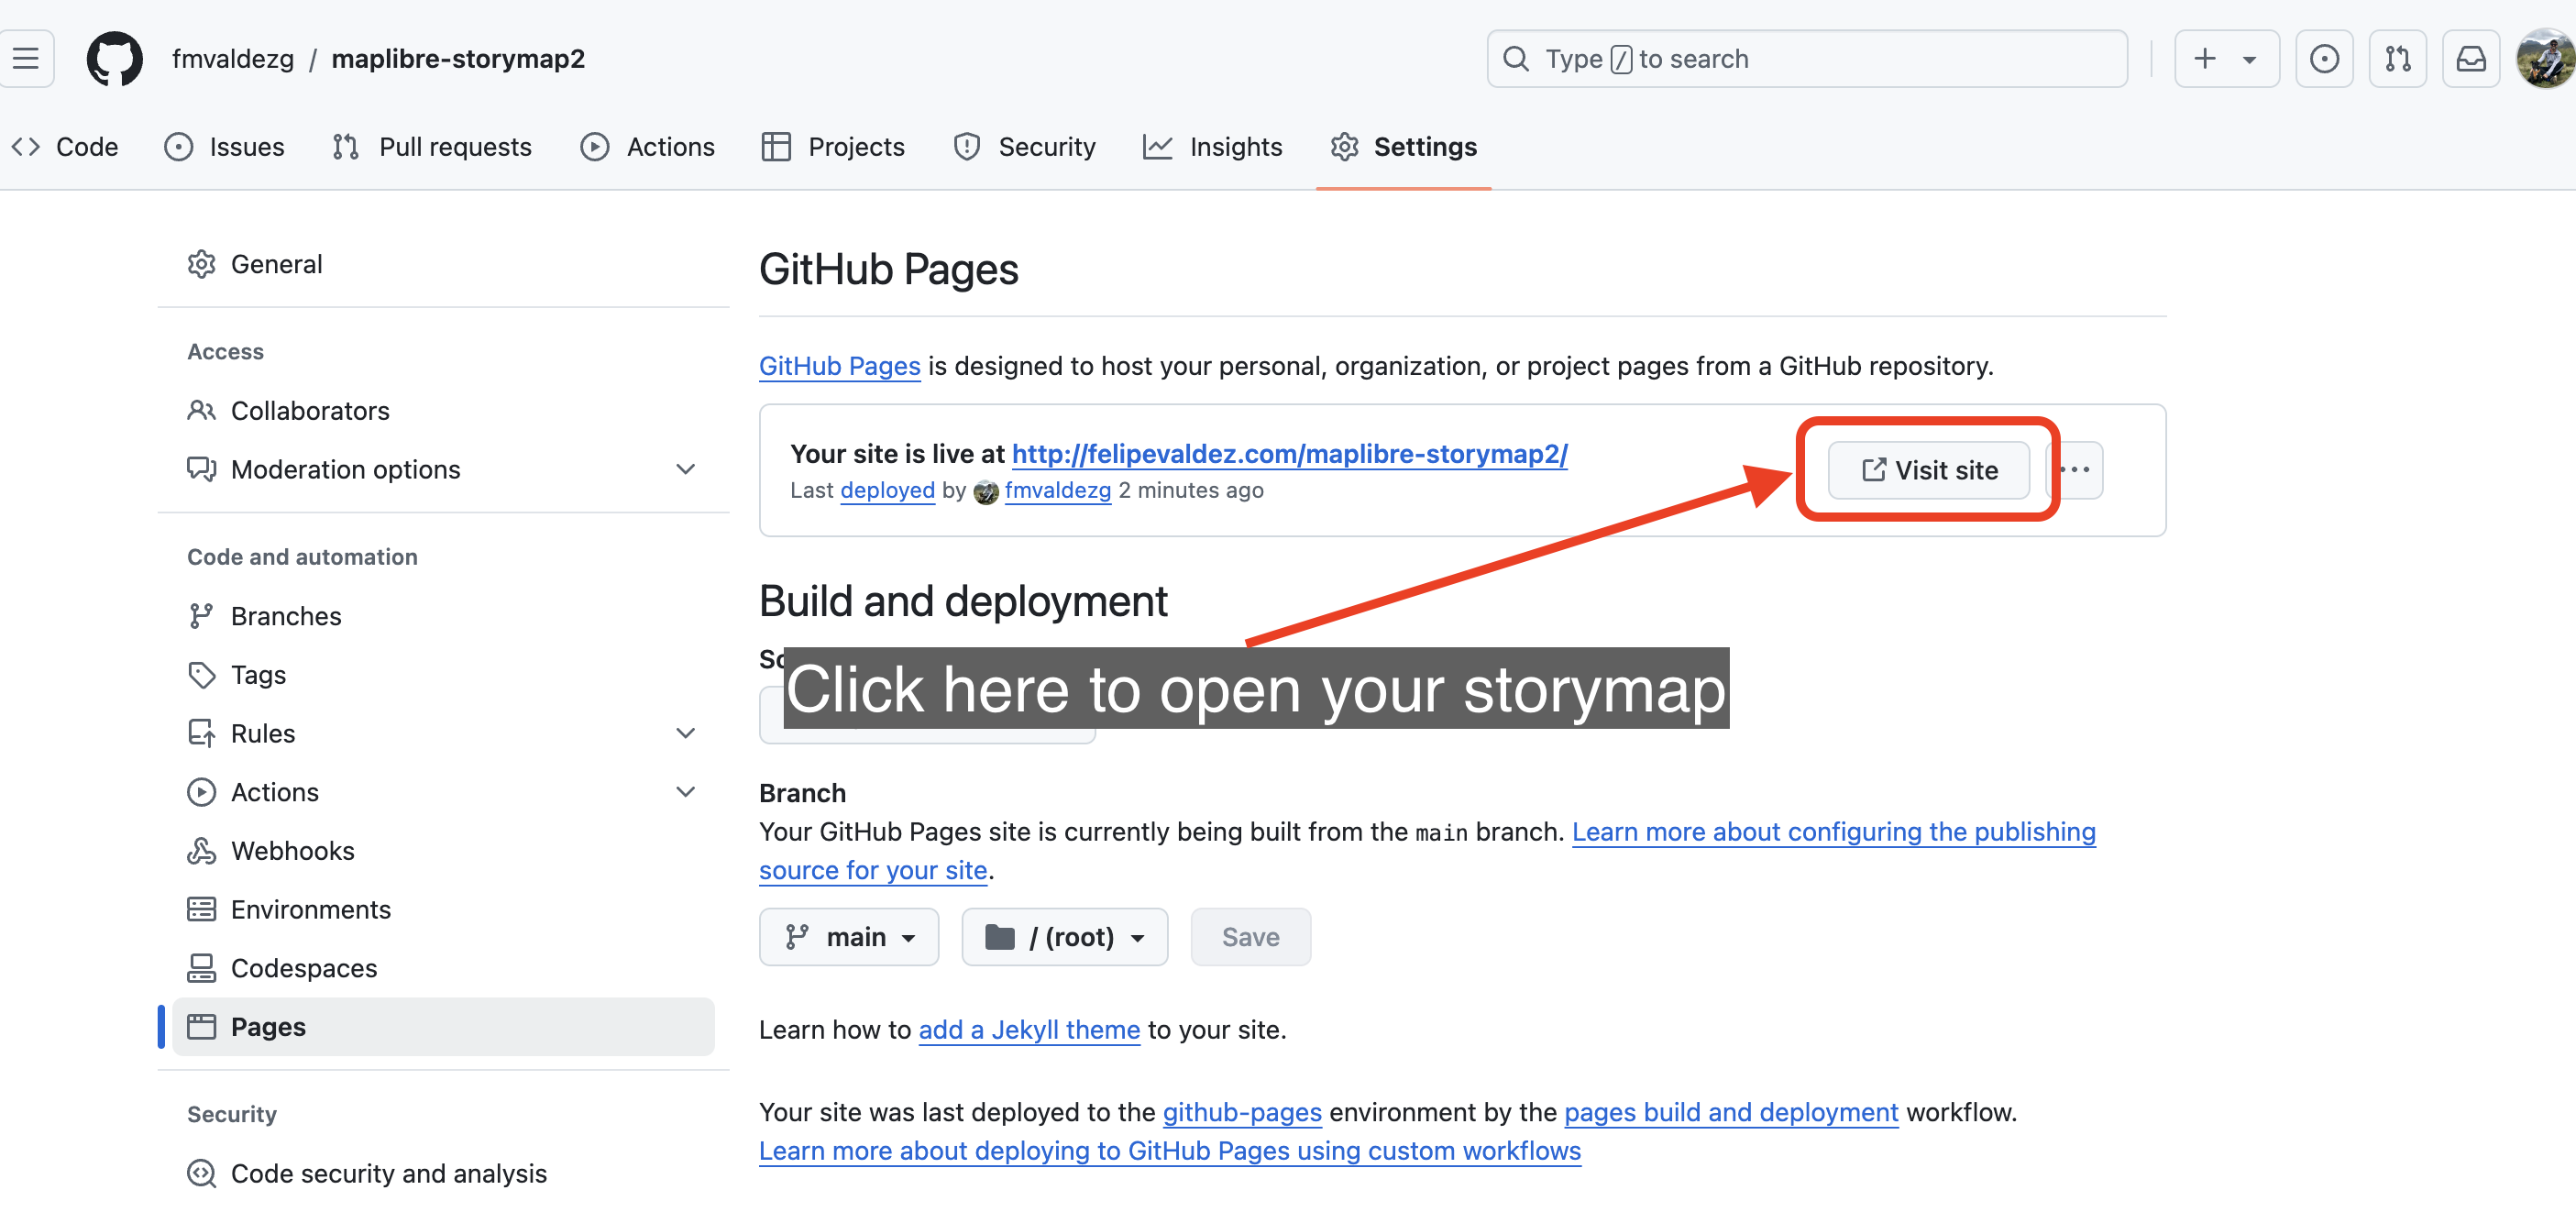
A new section will appear on the Pages settings window with the details of your deployed page.
Click on the Visit site button to open the story map on a new browser window.
Everytime you change something on your config.js file or add anything to your repository, GitHub pages will built the rendering files and deploy the new version of your map. The only thing you have to do is commit your changes and push the changes to the cloud if you are using GitHub desktop.